Quickstart
Access the interactive Quickstart from the user icon drop-down menu, or follow the instructions below.
AIML
Artificial Intelligence Markup Language (AIML) is an easy-to-learn chatbot scripting language. Inputs from C_lients_ (people chatting with your Bot) are pattern-matched to outputs defined by you, the Botmaster, in blocks of code called Categories.

Client: Hi Bot!
Bot: Hello world!
In the next five minutes, you will learn how to create, edit, chat with, update, and publish a bot using this interface.
Bot Creation
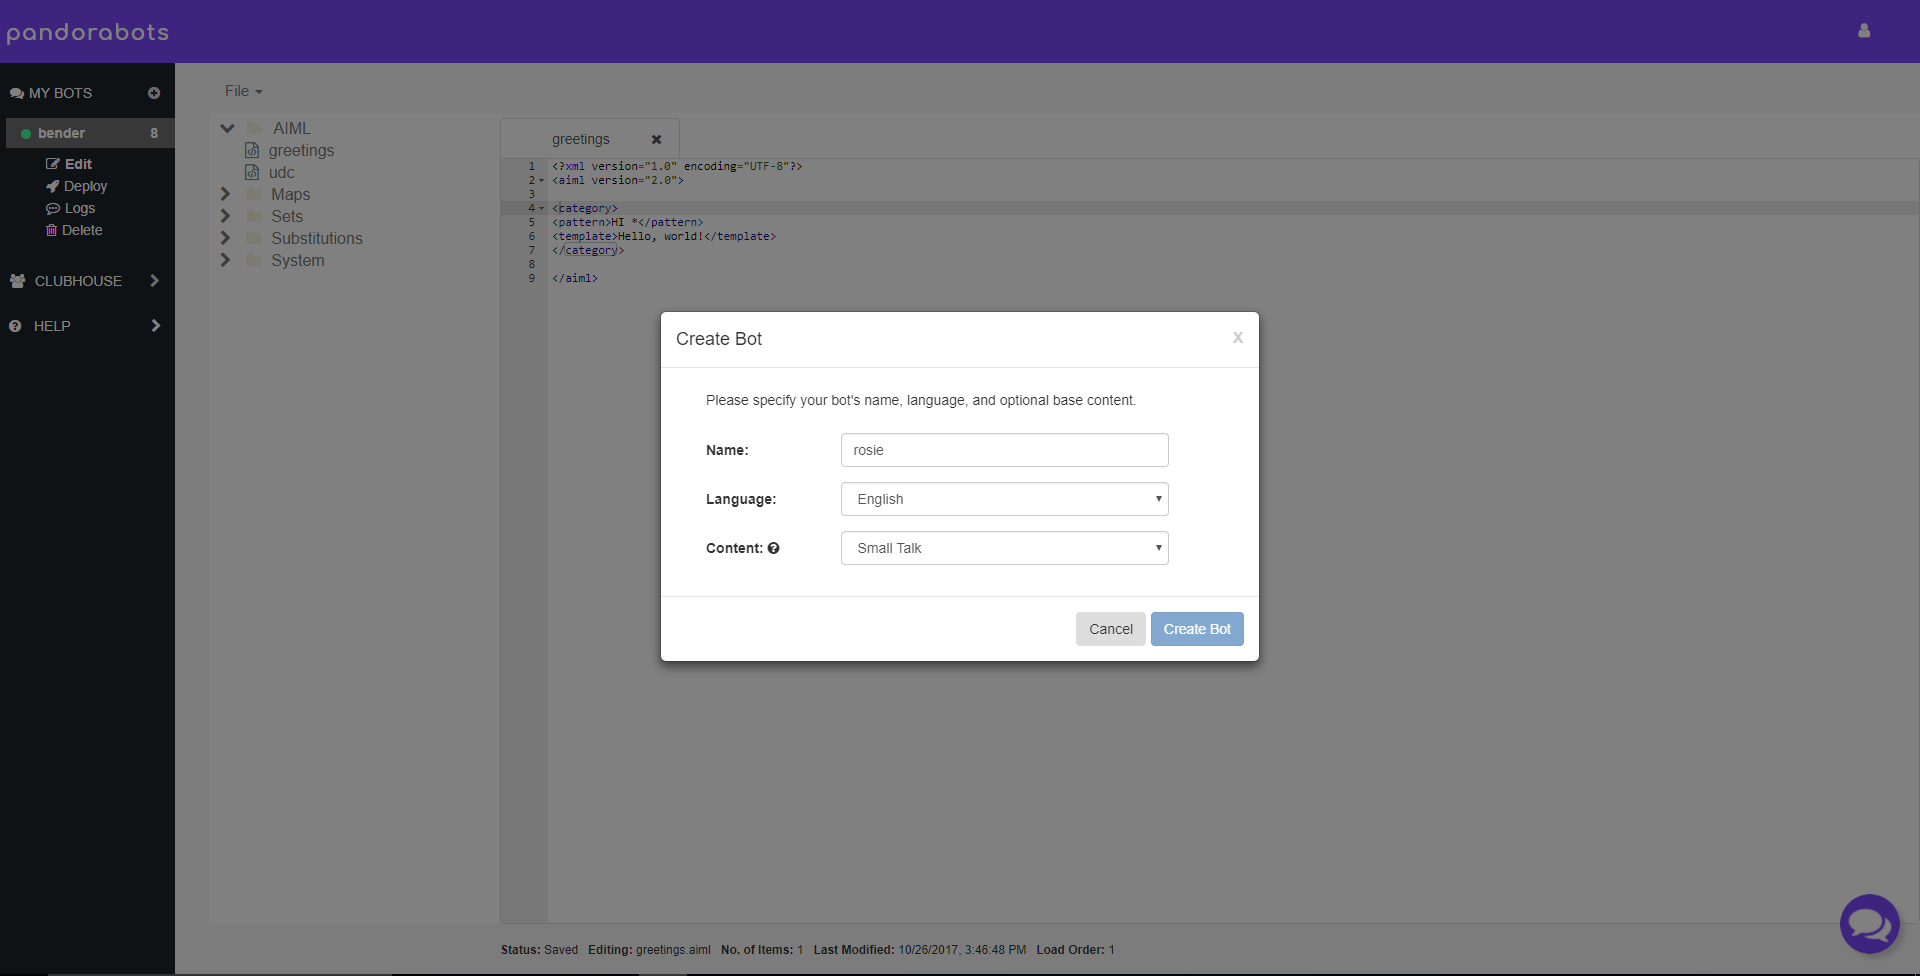
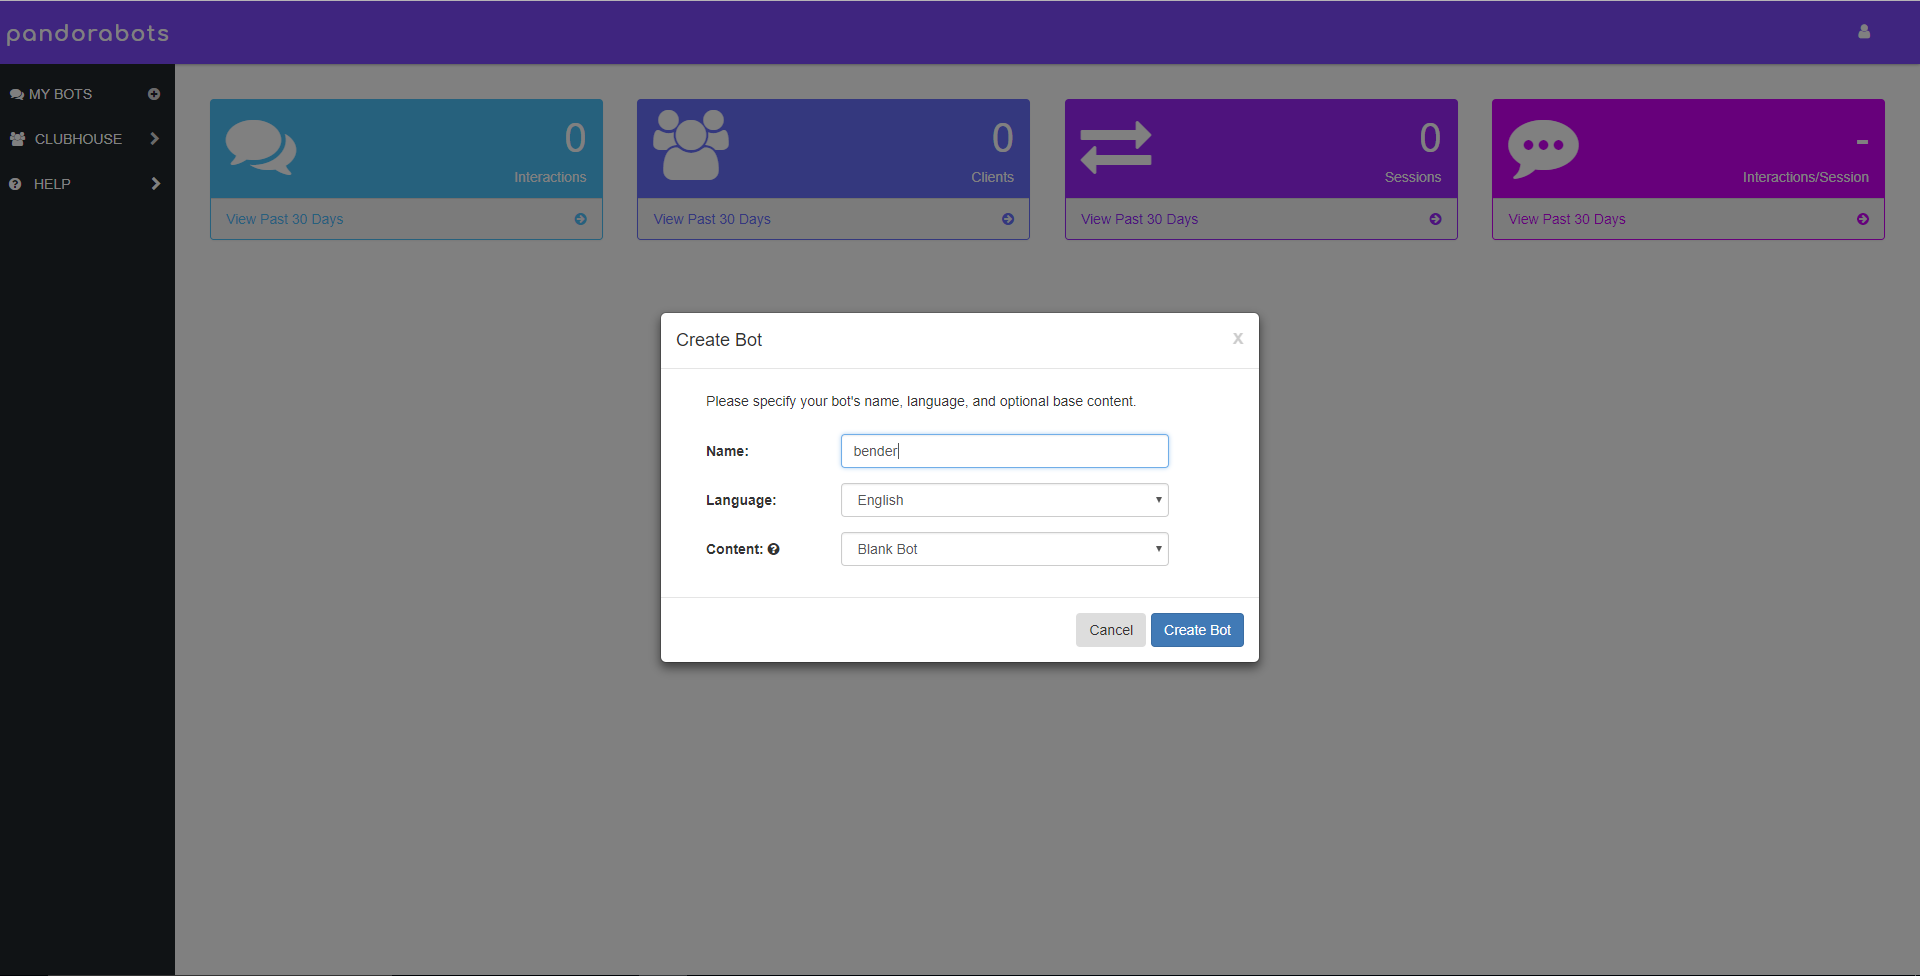
Create and name a new bot, leaving the default language English and Content Blank Bot.
Bot Editing
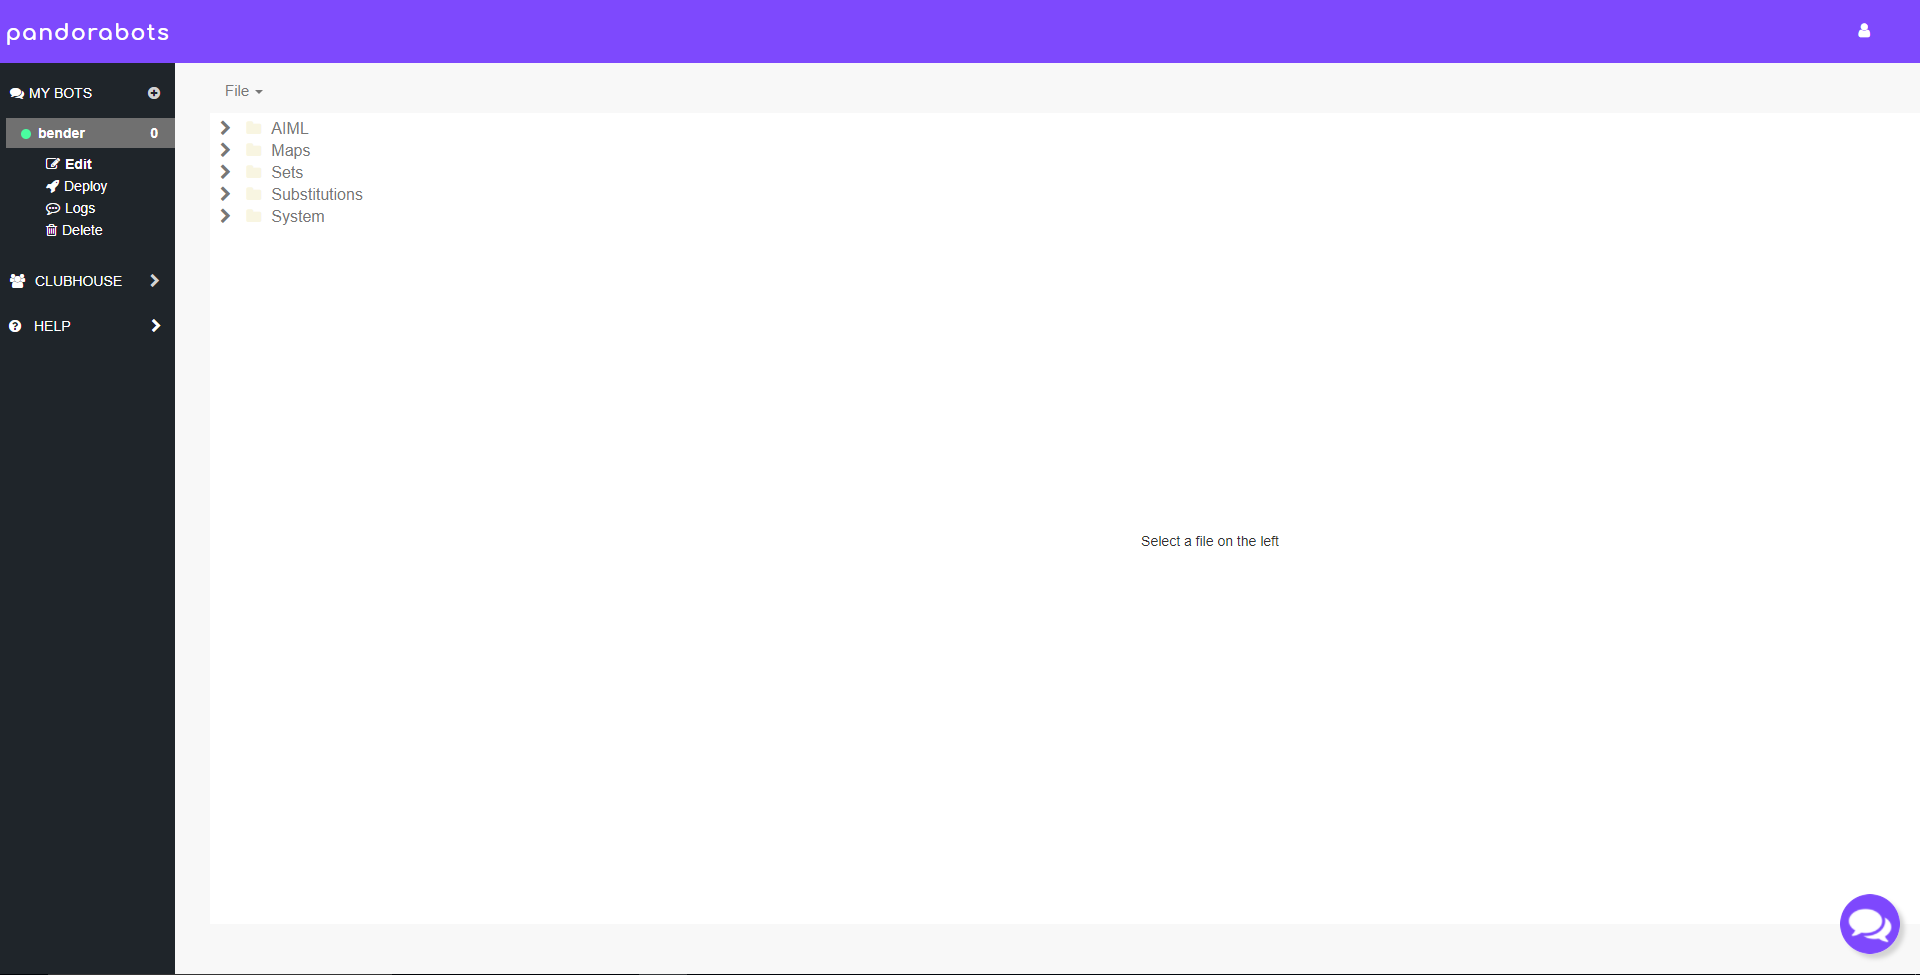
Our first stop is the Editor, where you can create and edit AIML and other bot files. Click Edit beneath your Bot’s Name to navigate to the Editor.

Creating Categories
The Editor is where you will write AIML files and categories that will allow you and others to talk to you bot.
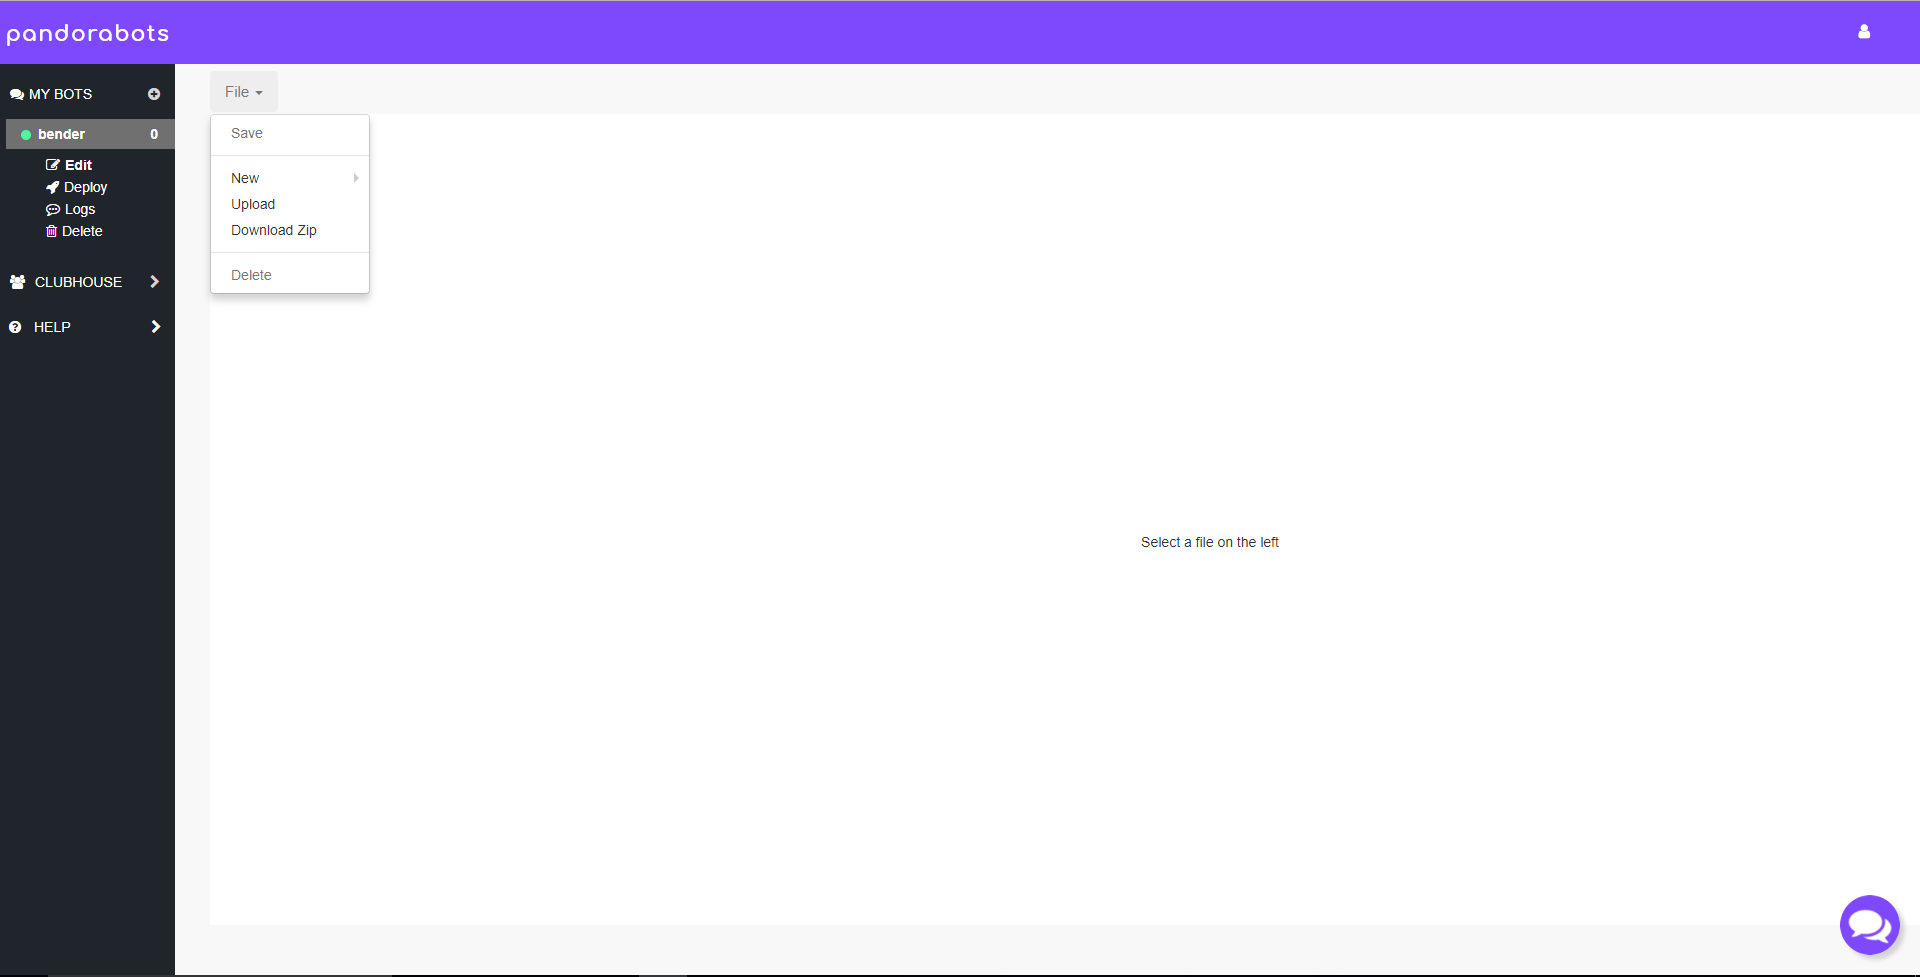
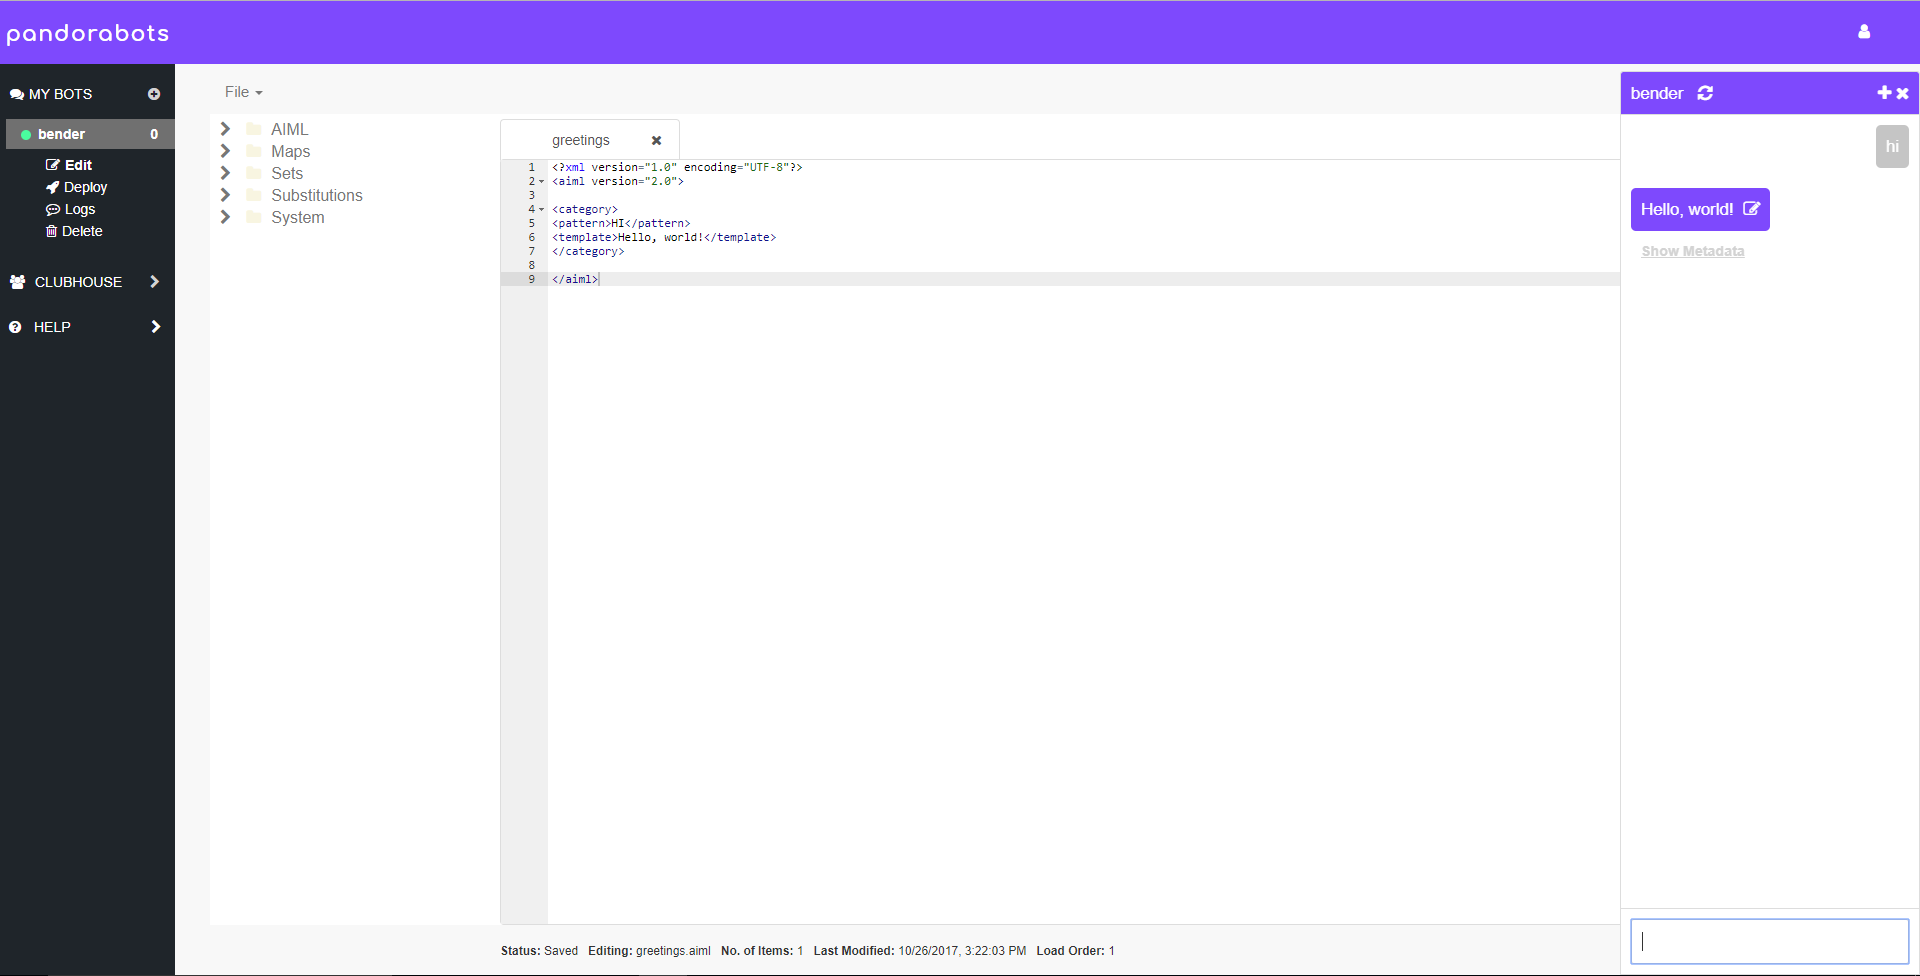
Use the File Menu to create a new AIML file called greetings.
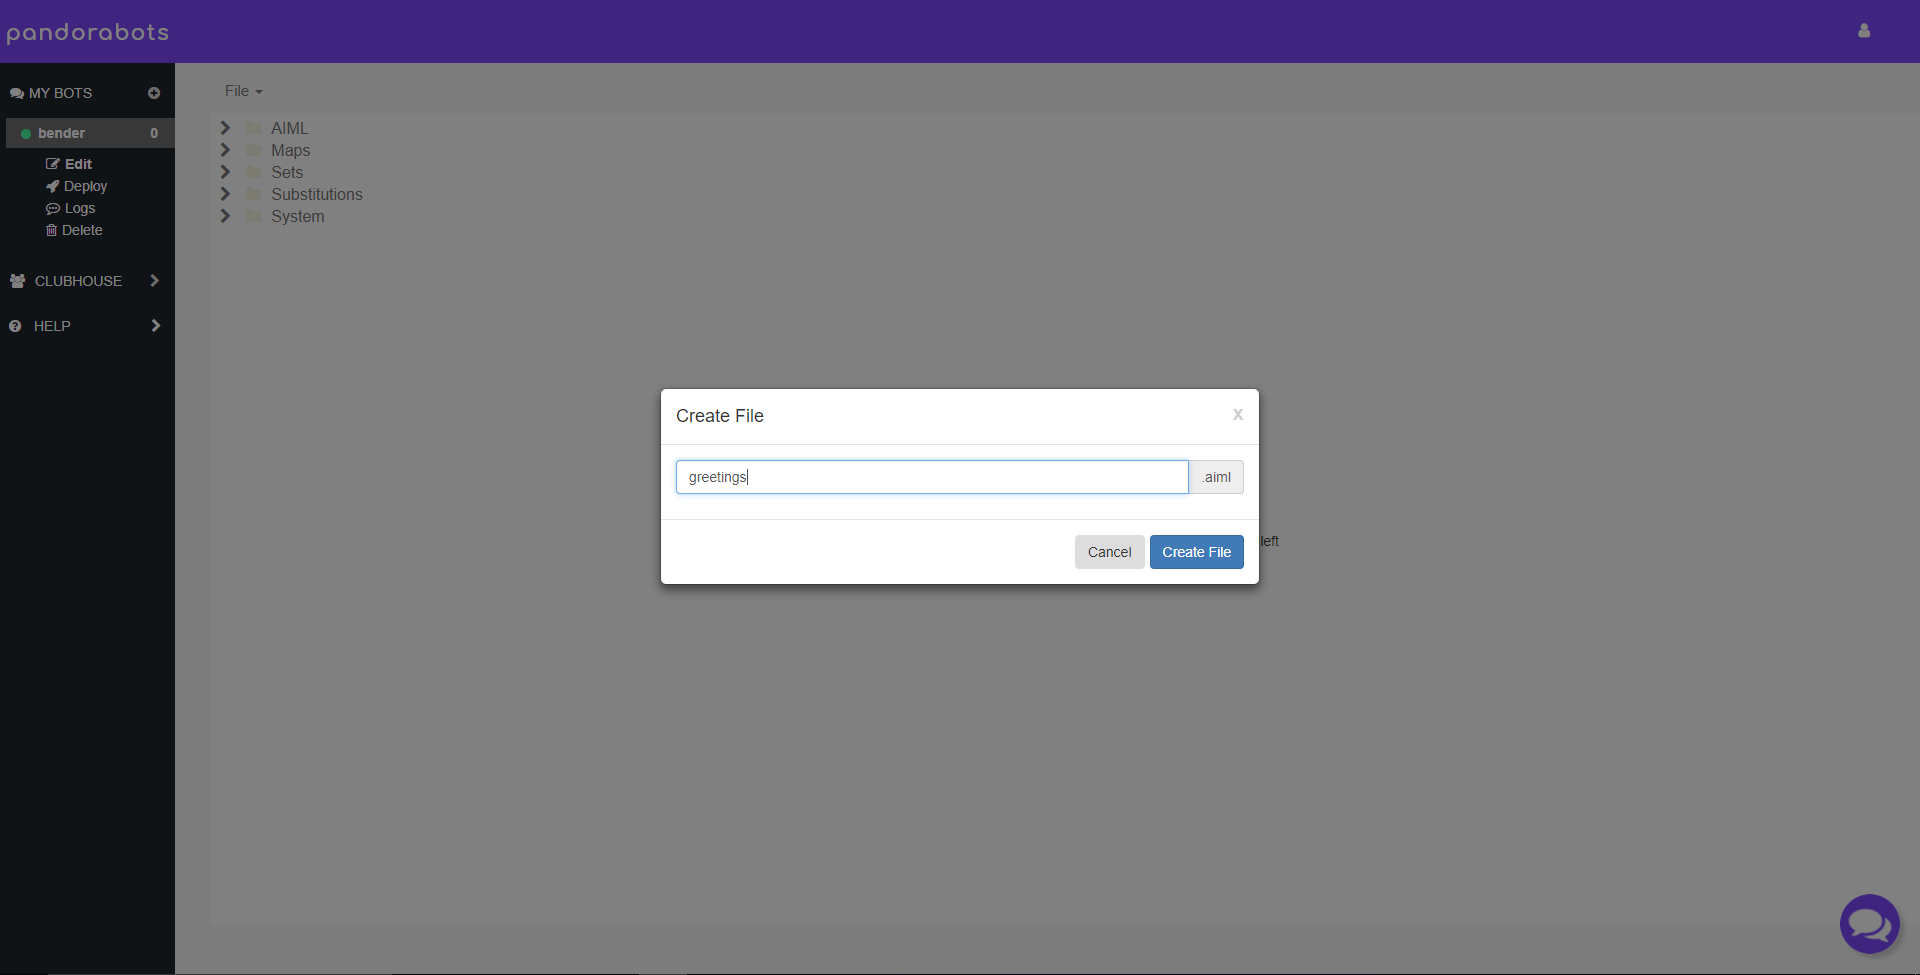
Hello, World!
Copy the code for the following category into the text editor in between the start <aiml> and end </aiml> tags:
<category>
    <pattern>HI</pattern>
    <template>Hello, world!</template>
</category>
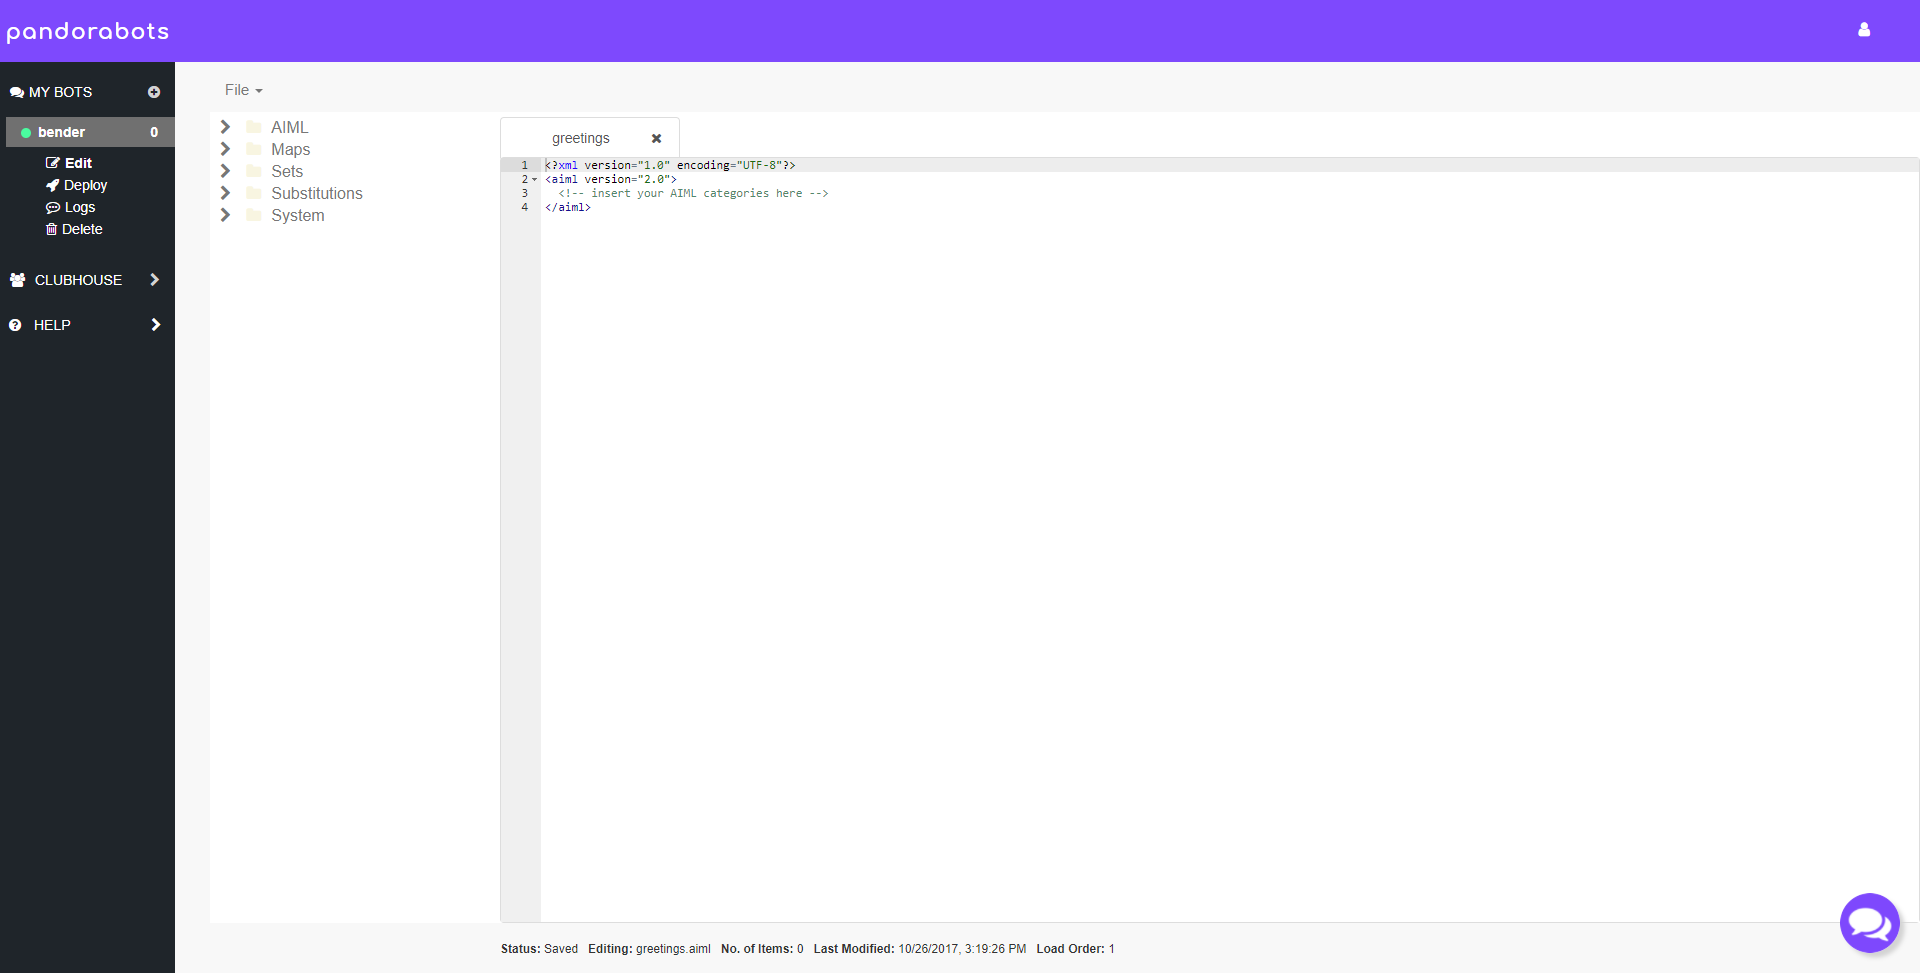
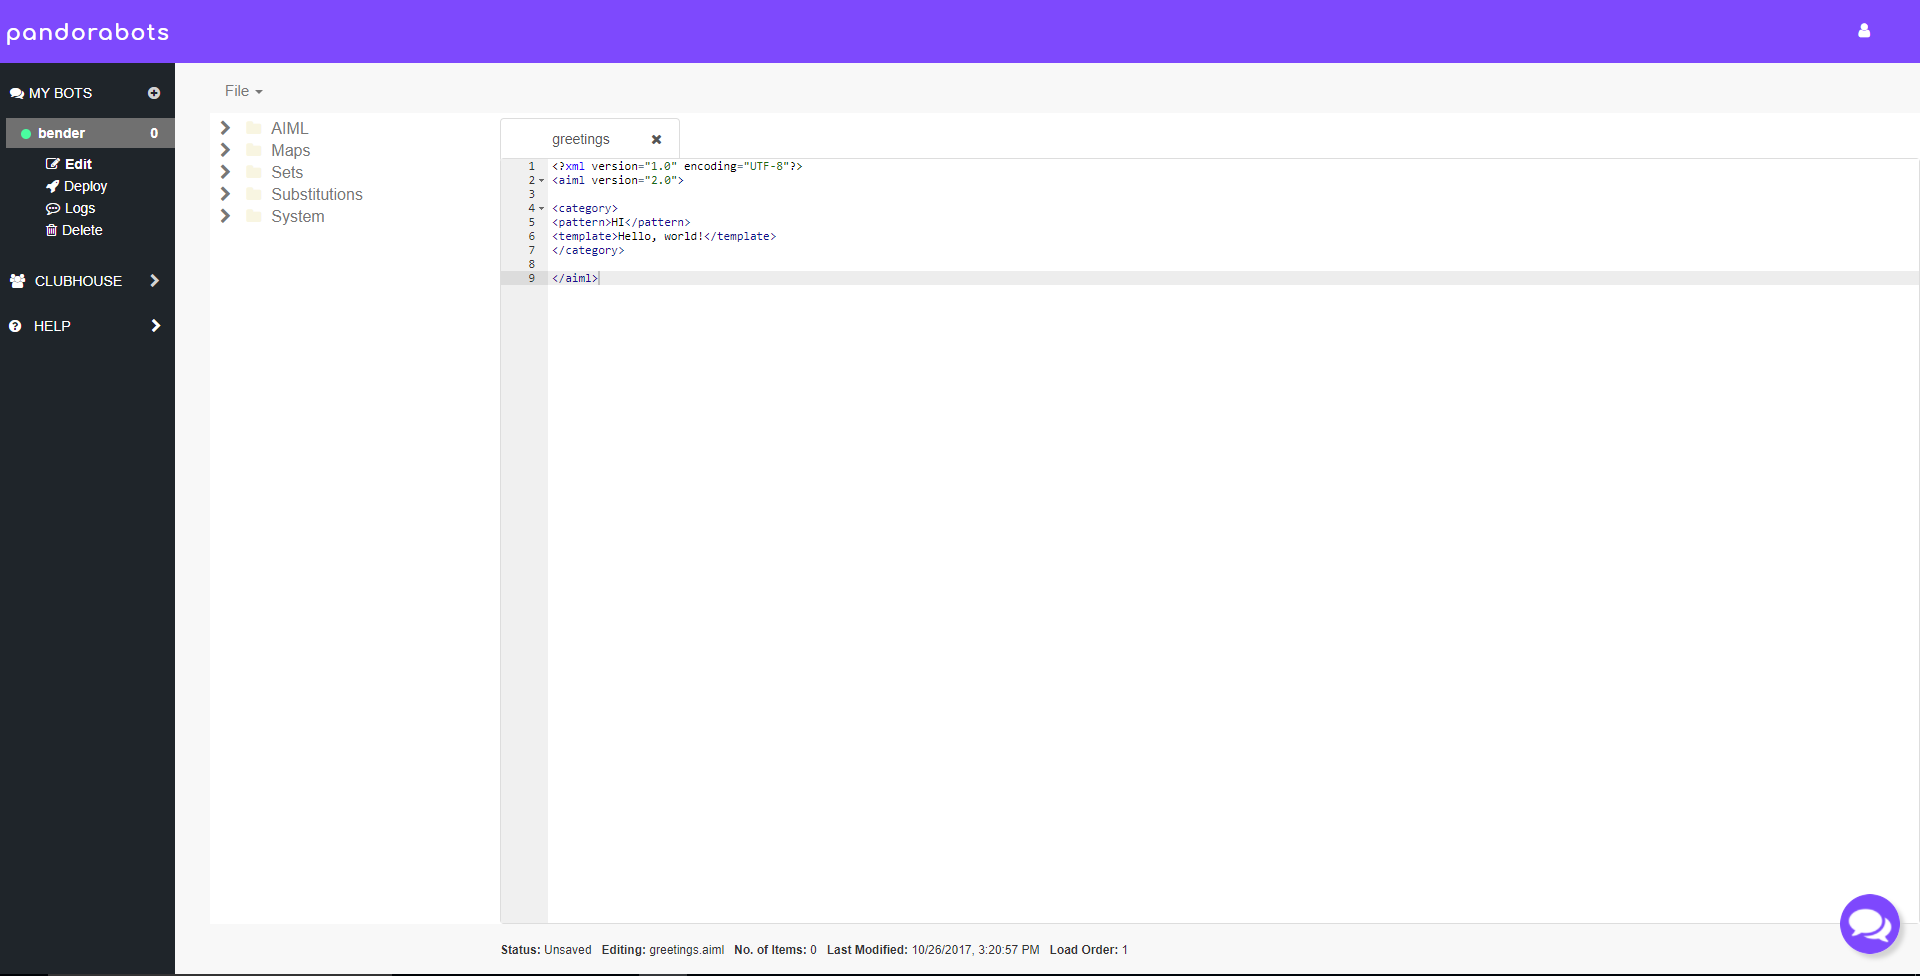
Once completed, save your file via the “File” drop-down menu.
Testing and Training via the Chat Widget
The Chat Widget allows you to talk to your bot as if you were the client. Open a new chat and type Hi (or “hi” or “HI” since pattern matching is case-insensitive) and you should receive the response you just coded, “Hello, world!”
Wildcards
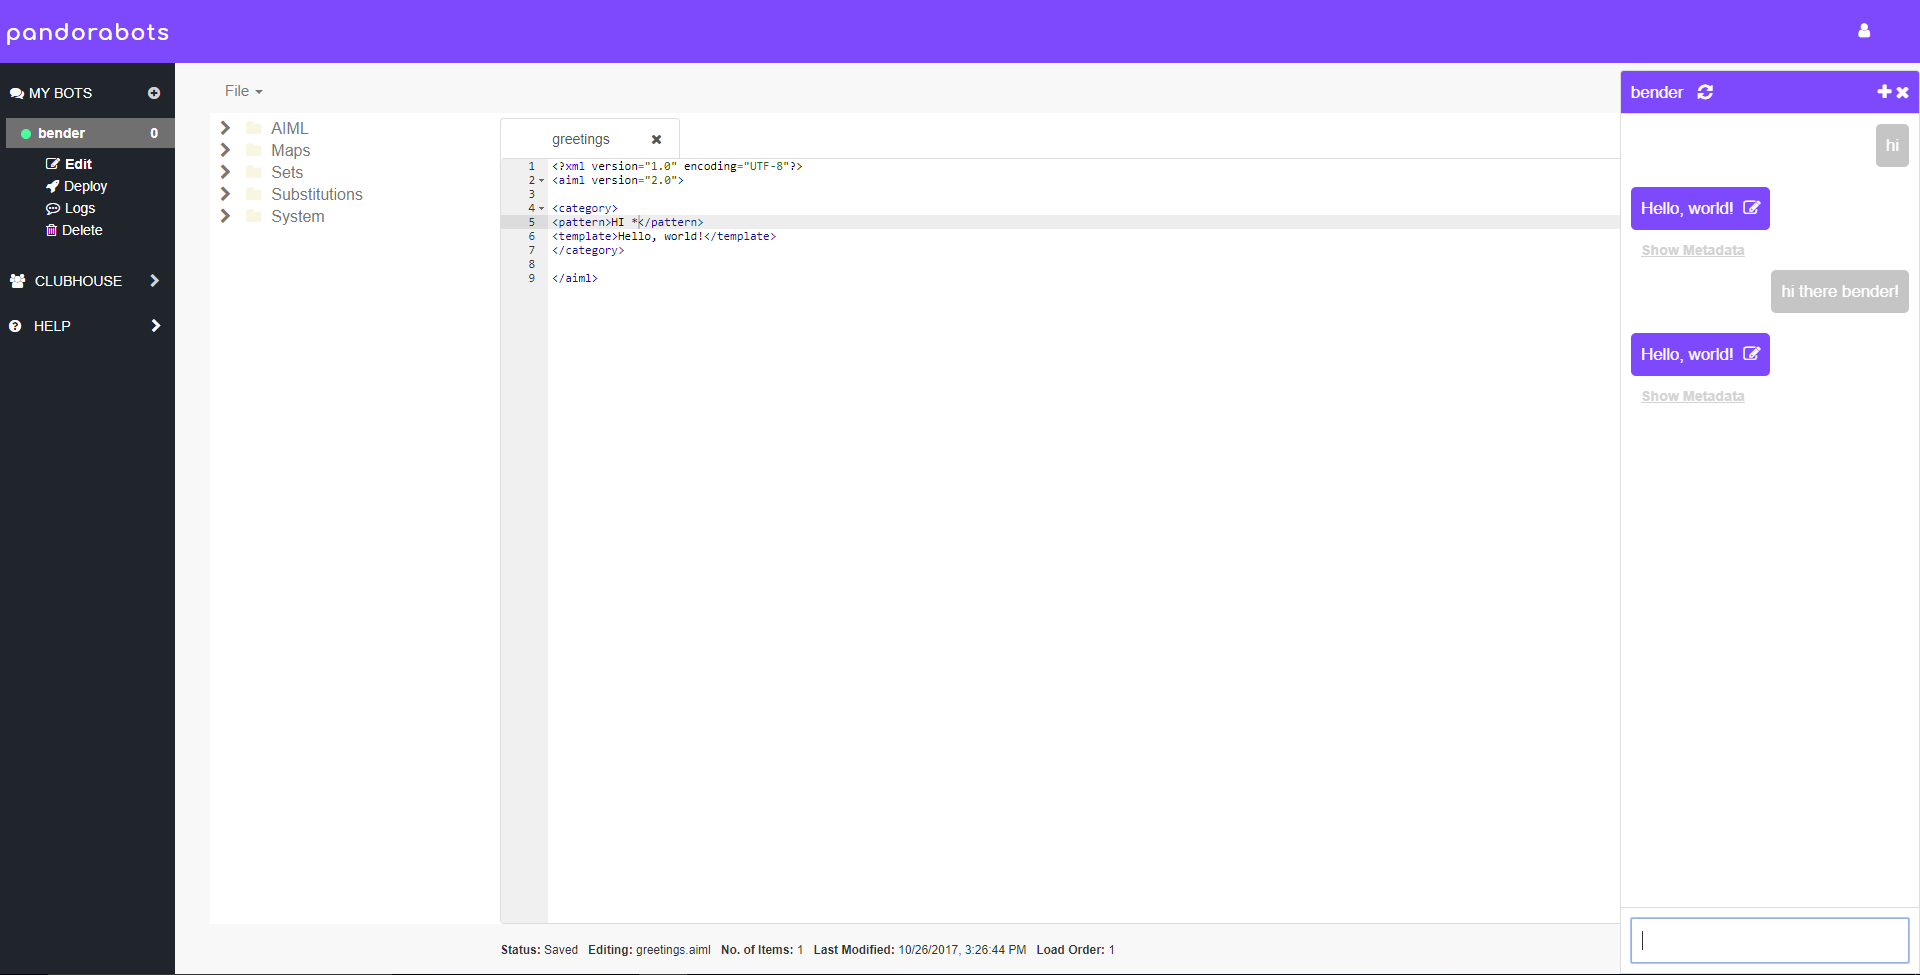
Congratulations on creating your first category! Now, add a * wildcard to the pattern after HI, which will enable matching any phrase that starts with Hi. It should look like this:
<category>
    <pattern>HI *</pattern>
    <template>Hello, world!</template>
</category>

Save your file, then test out any phrase that starts with hi (e.g., Hi there!) in the Chat Widget, which should return “Hello, world!”
Introducing the Ultimate Default Category
Now, try typing anything that doesn’t start with hi to your bot. No matter what you say, if your bot fails to find a match for the input, it will return “I have no answer for that.”
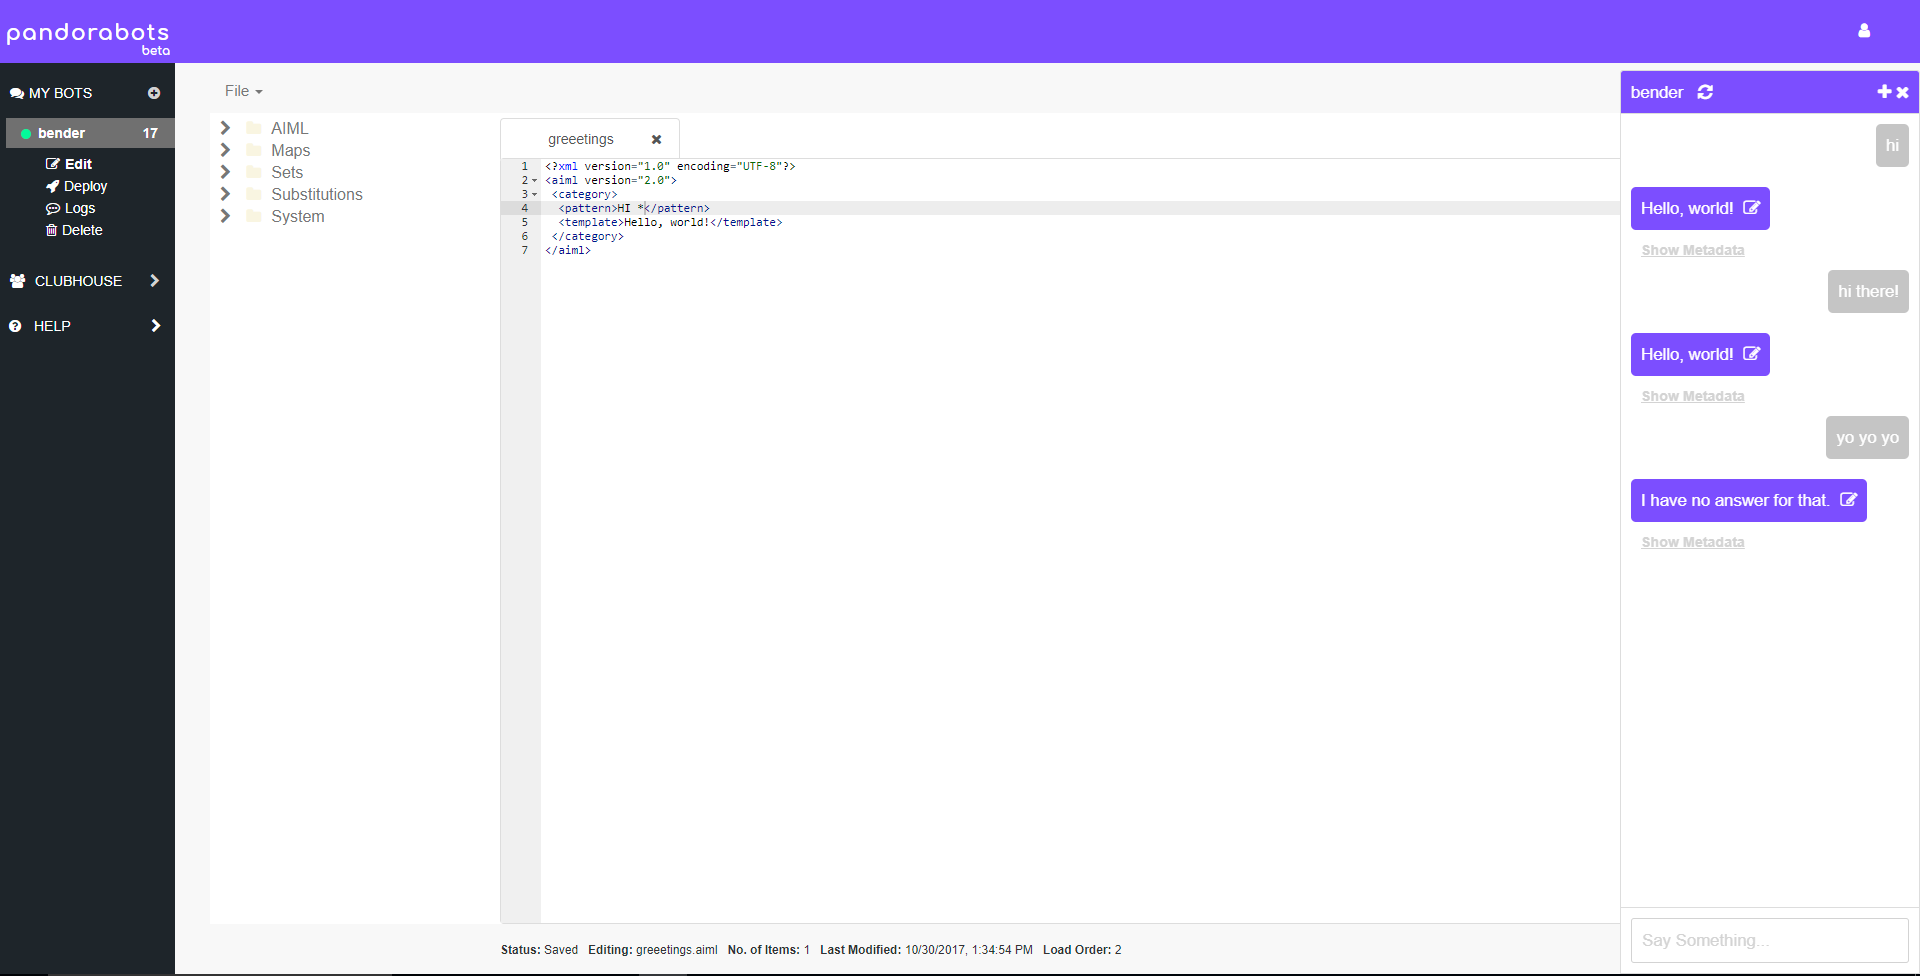
Inputs that do not have a response defined trigger what’s known as the Ultimate Default Category (UDC).
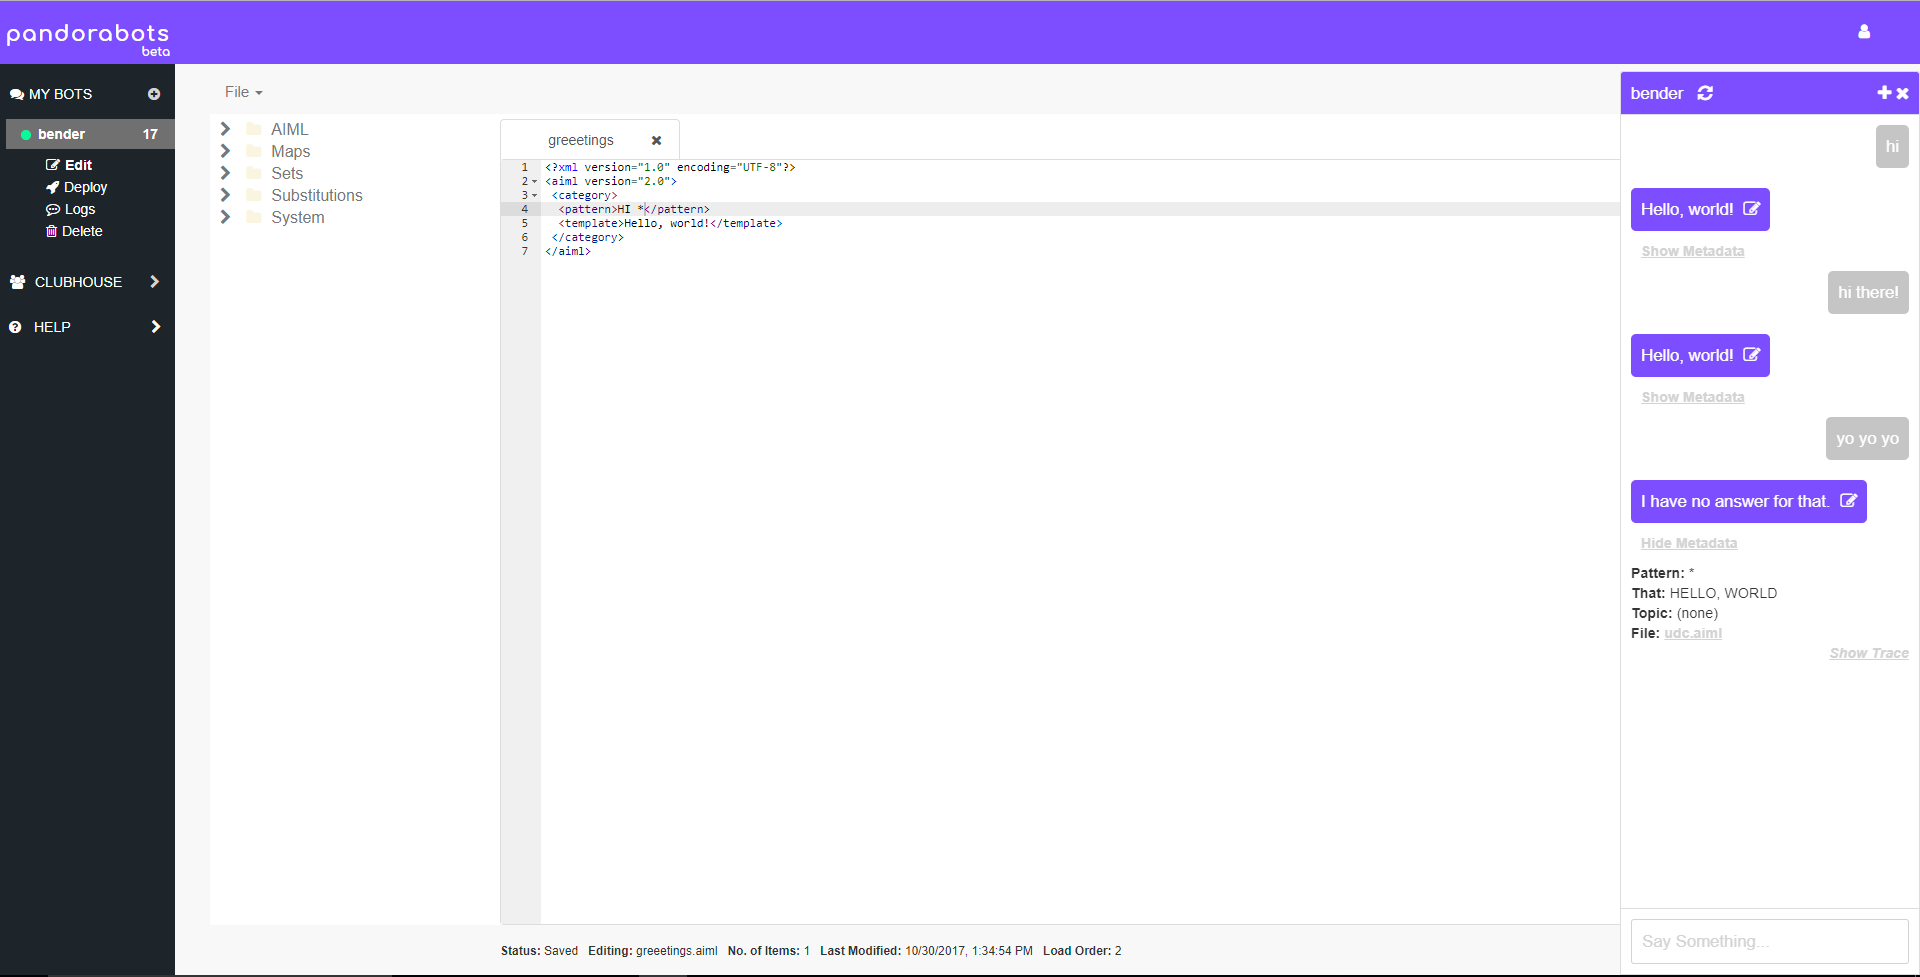
Click Show Metadata beneath your bot’s last response and you will find some additional information about the interaction, including the pattern that matched and a link to the file containing that pattern. Click on the udc.aiml link.
Defining the Ultimate Default Category
All bots come preloaded with a few fundamental files, including the UDC so your bot always has a fallback response.
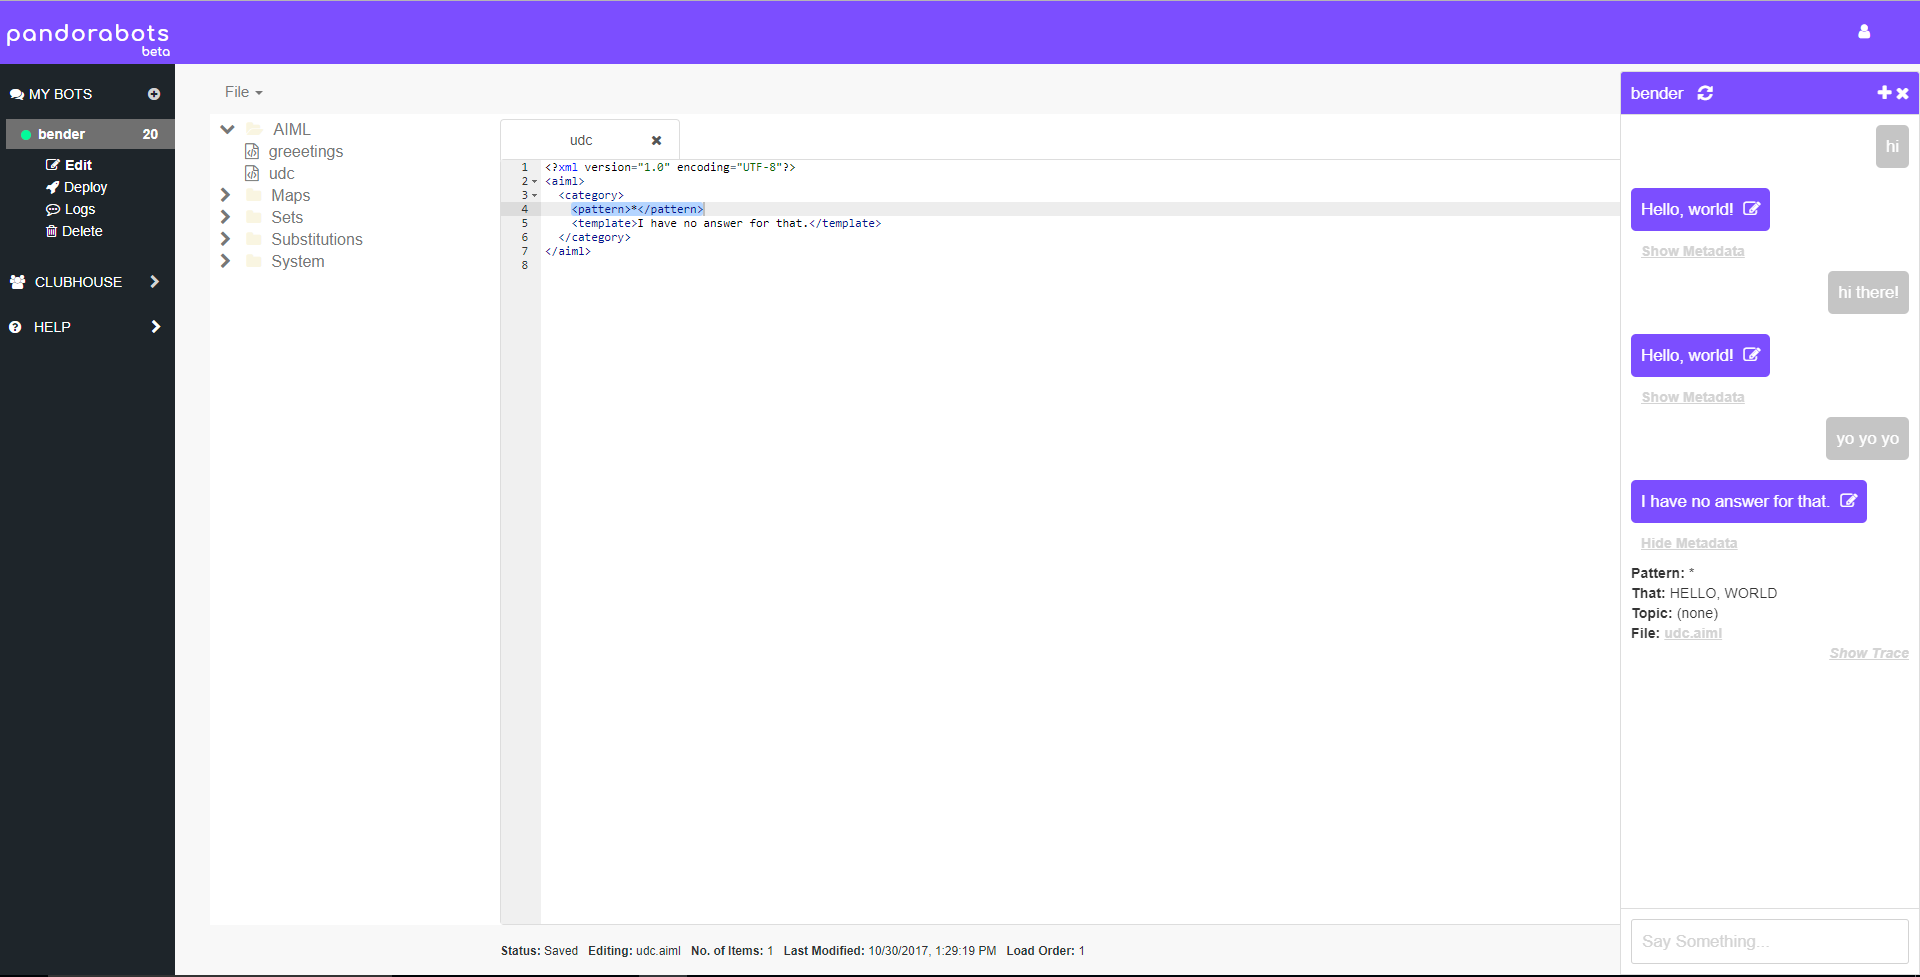
The * wildcard in the pattern will match any input of one or more words, meaning anything the client enters that doesn’t have a category defined already will match and return the template text.
You are free to edit the UDC template however you like: to provide customer service contact info, ask the client to rephrase their question, apologize or crack a joke, or whatever makes sense for your use case.
Editing Bot Responses via the Chat Widget
You can also edit your bot’s response directly from within the Chat Widget. Click the edit icon inside the chat bubble and write a new response to whatever you just typed, then add it to the appropriate aiml file.
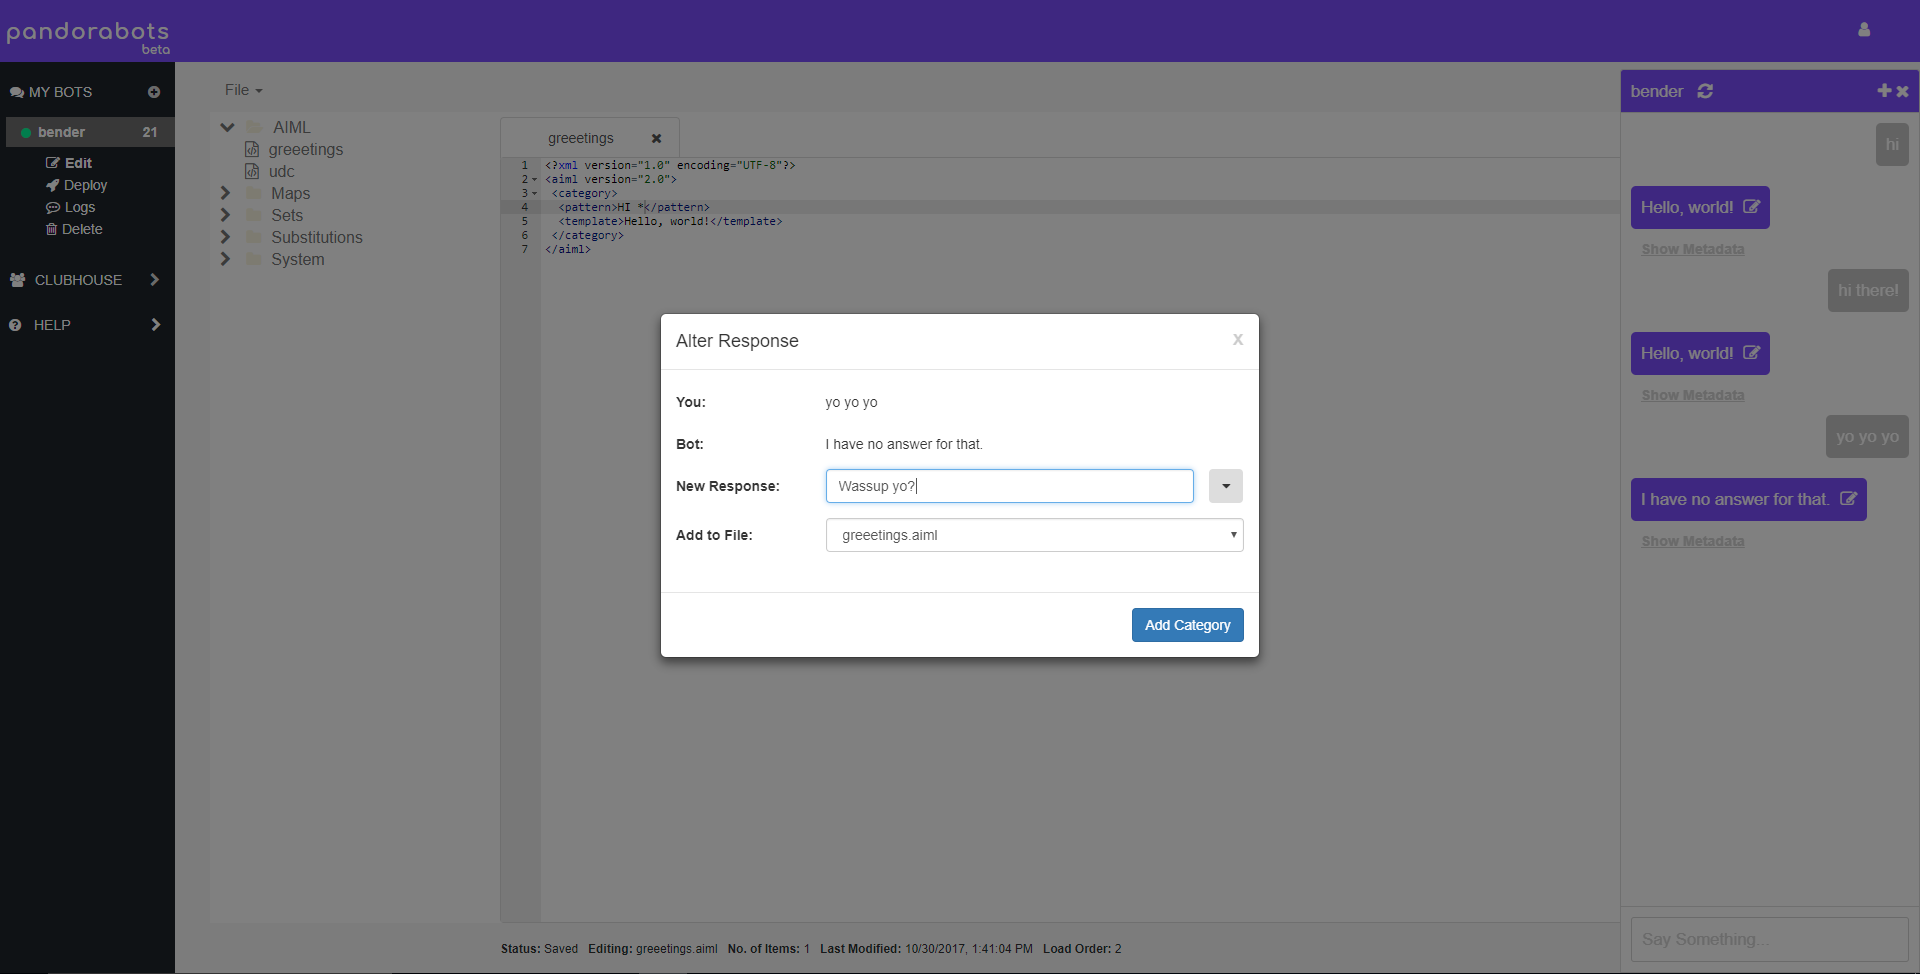
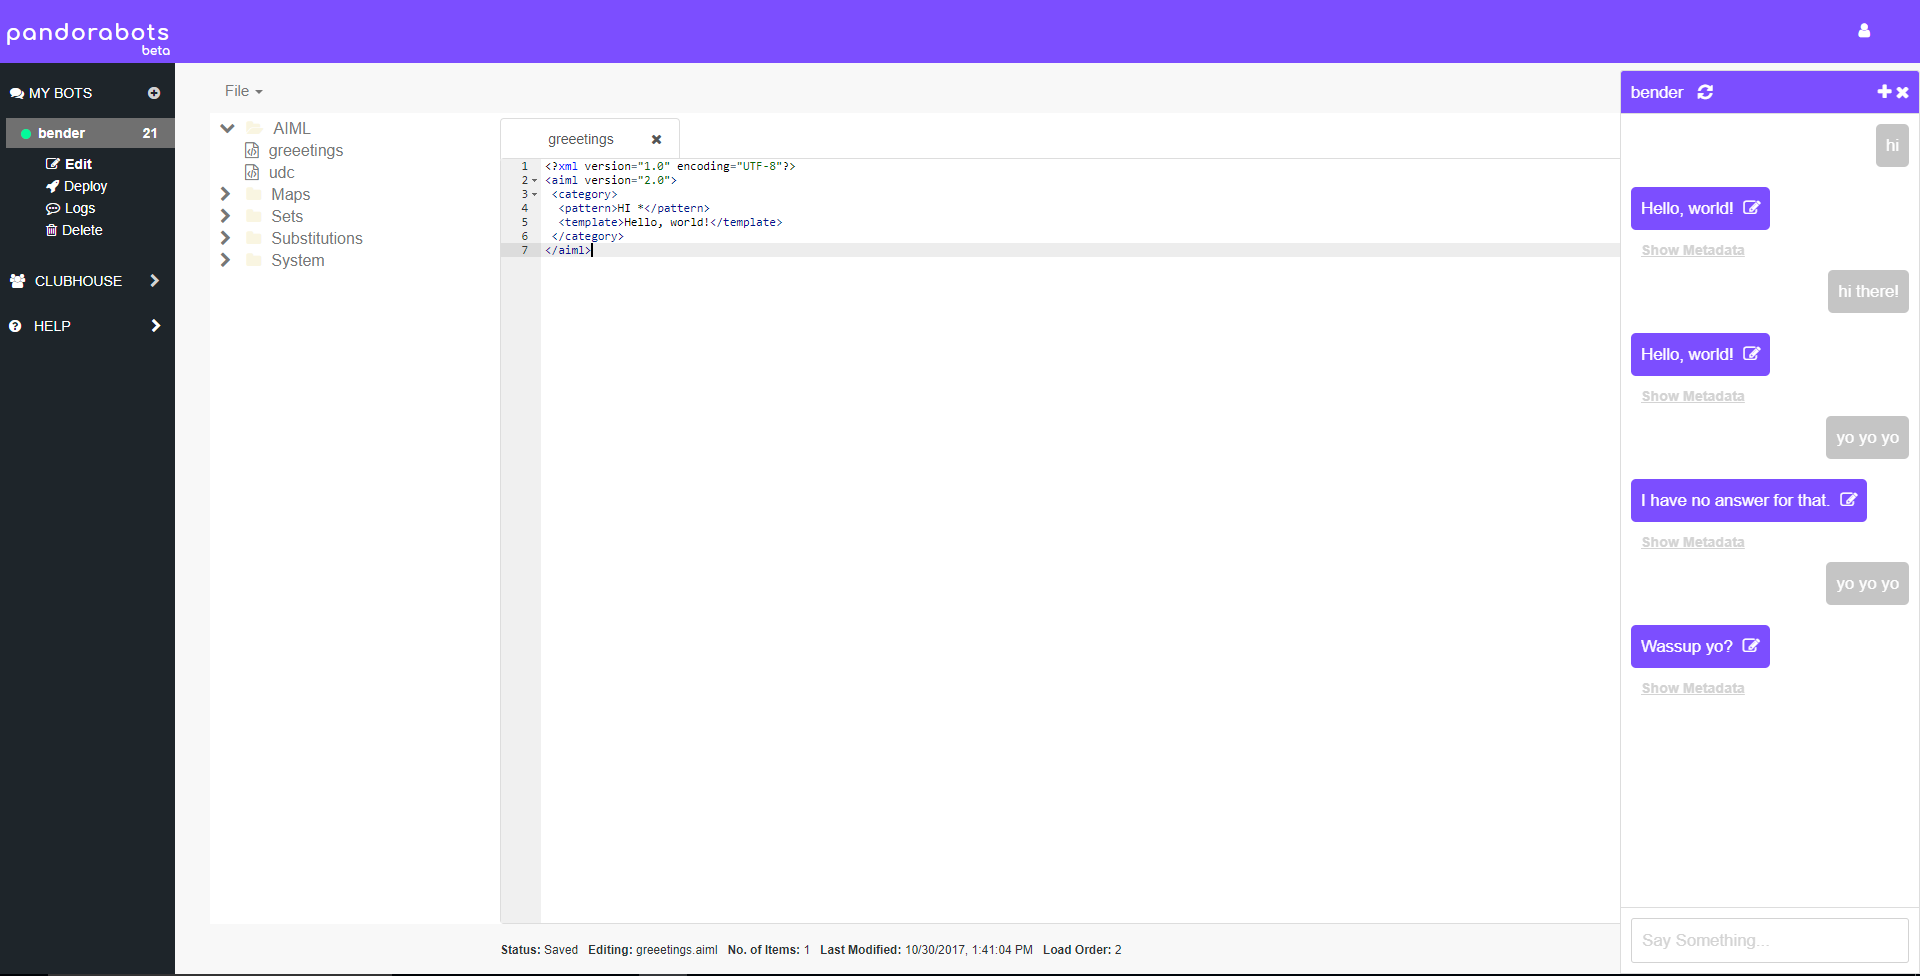
Reviewing client inputs that trigger the UDC allows you to train your bot to grow more intelligent over time. Log review, accomplished via the Logs page, is a critical aspect of bot development.
Log Review
Go to the Logs.

Log Priority Ordering
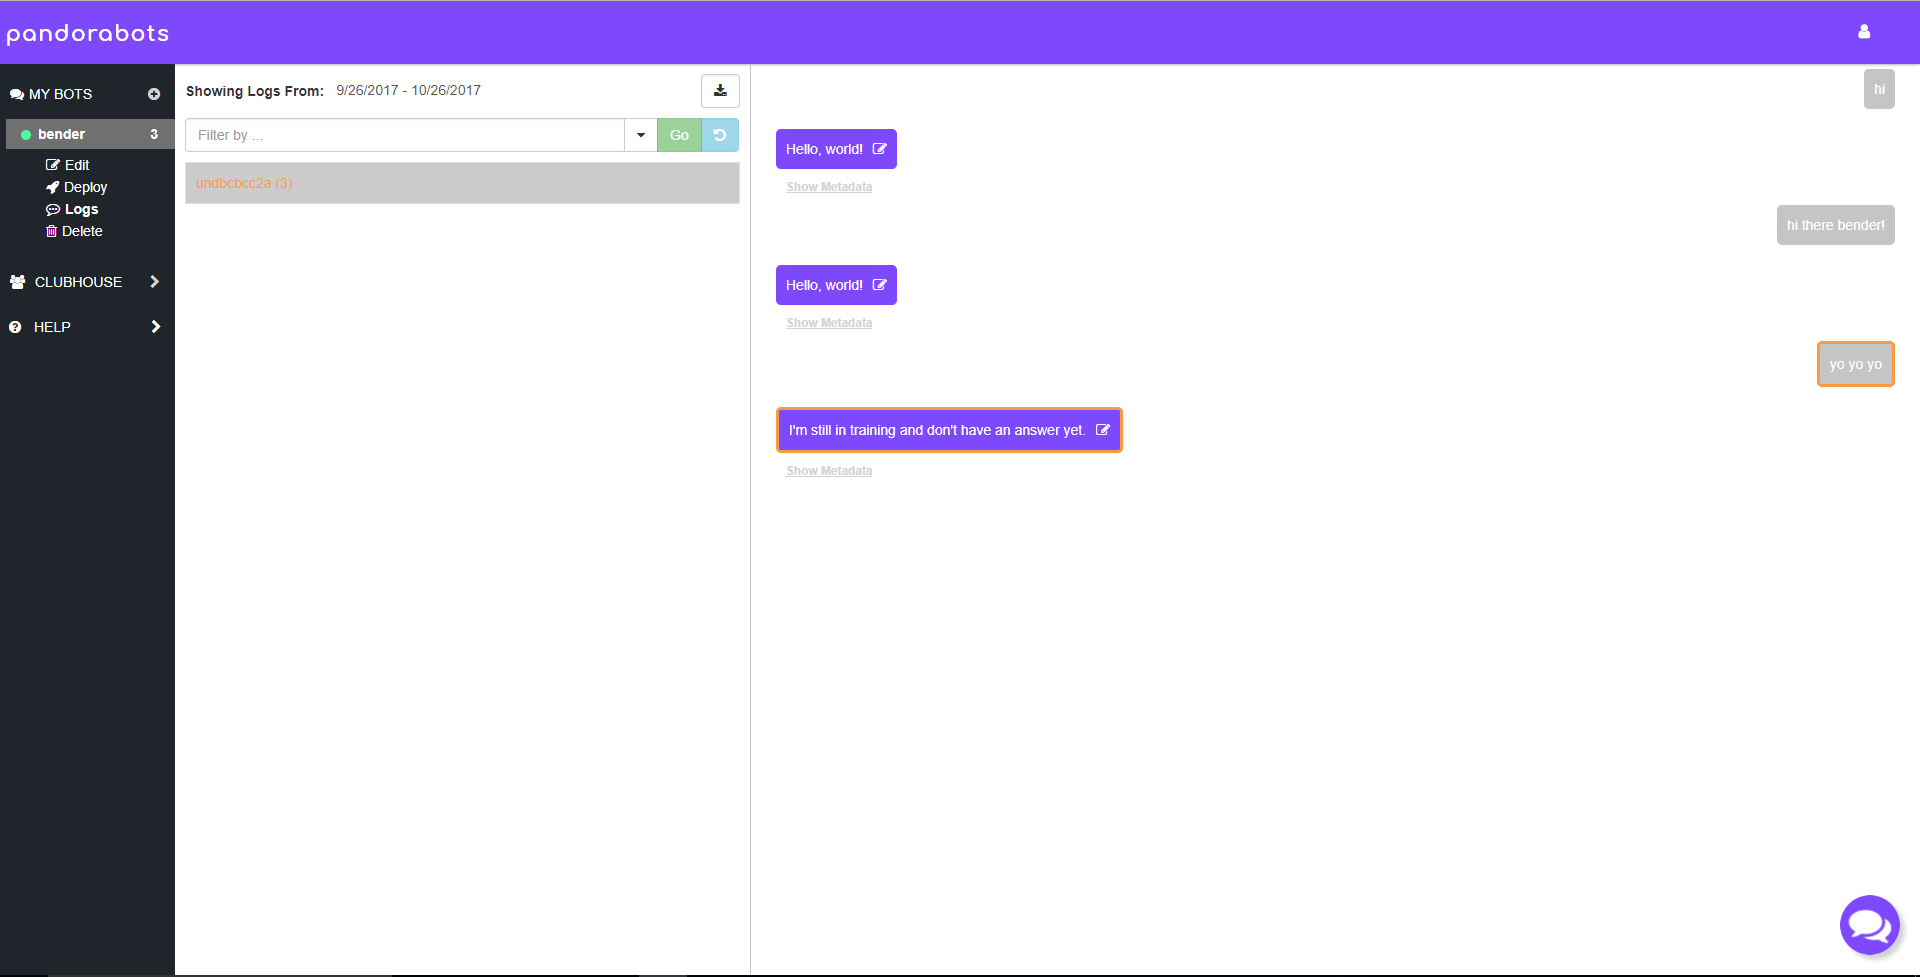
Chat logs are displayed dating back 30 days and available for download.
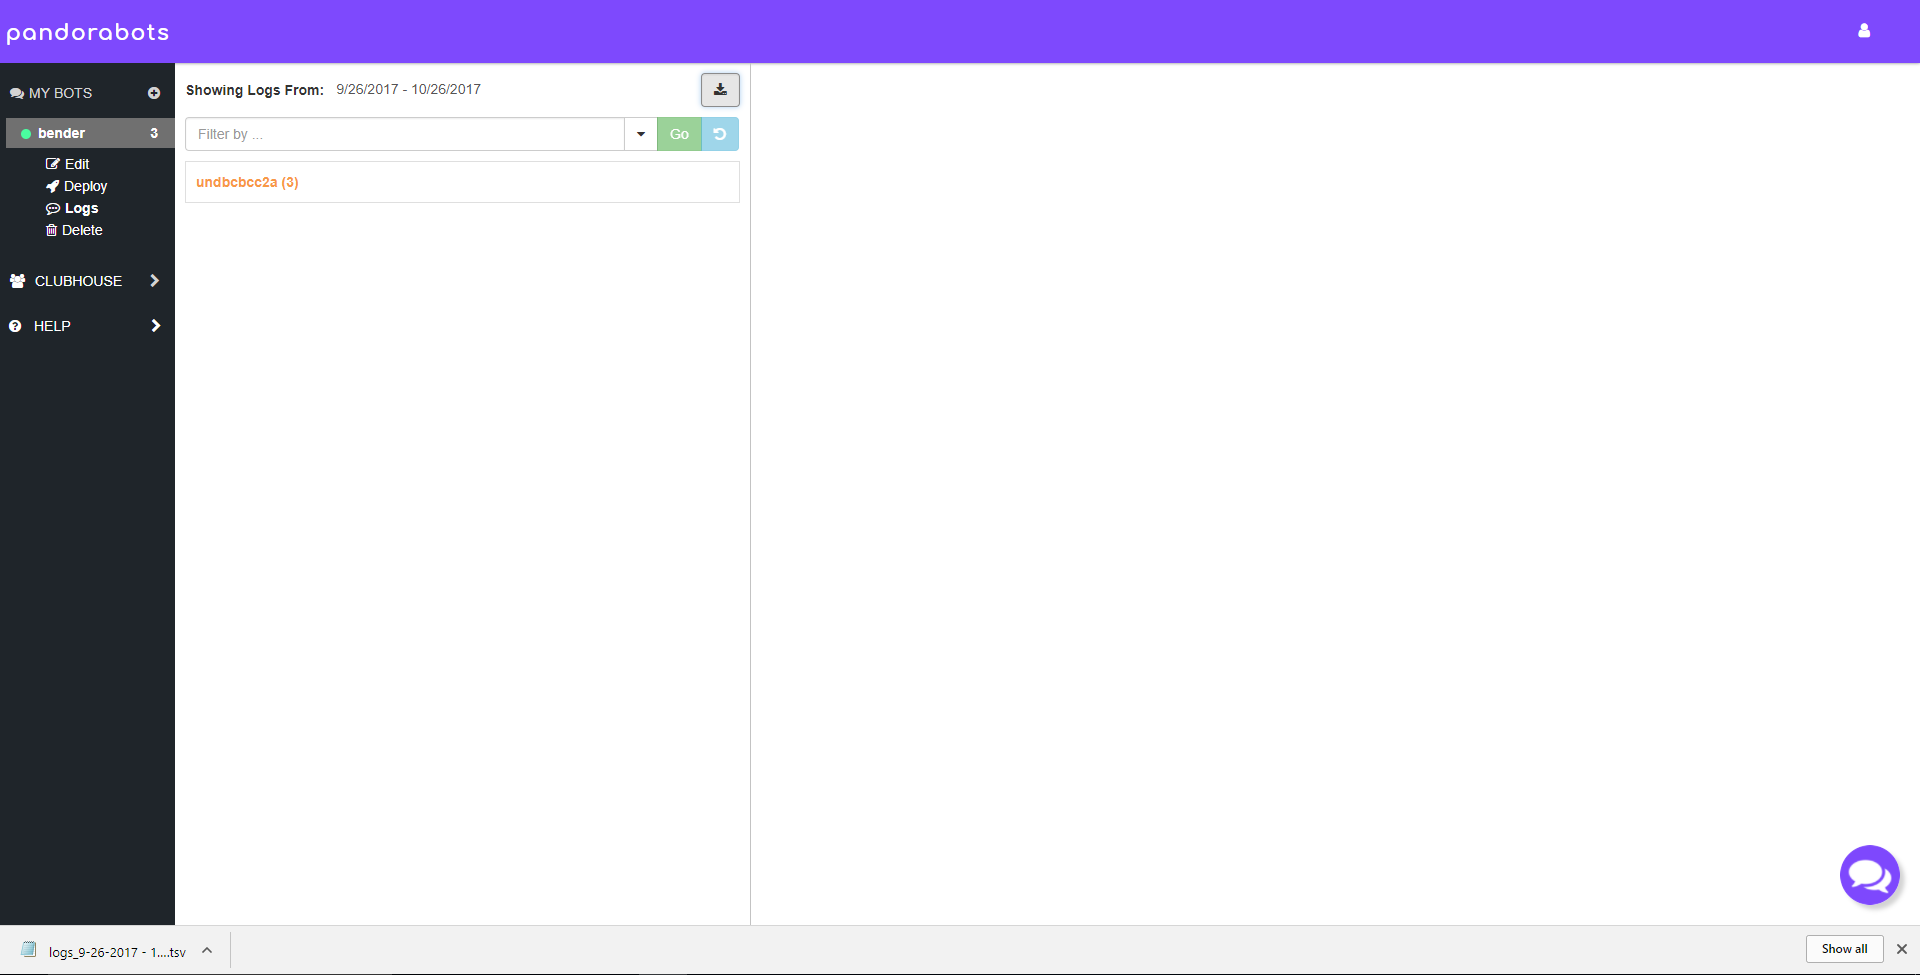
Unread conversations appear in bold. Orange conversations contain at least one input that triggered the UDC, meaning your bot did not have an answer for the client’s input.
Click on the log item to open your message history with the bot.
Displaying and Understanding Metadata
Orange highlighted input-output pairs that triggered the UDC are the highest priority log items to correct.
Clicking Show Metadata will reveal more information about the interaction, including a timestamp, the pattern that matched, the THAT (the bot’s memory of its previous output, the last sentence it uttered), the TOPIC (which can be defined so context persists), and, finally, the file containing the category activated by the input.

When you are ready to start collecting logs from actual clients, you can publish your bot via the Deploy page.
Bot Deployment
Go to Deploy.
Integrations and the Pandorabots API
There are a number of ways to make your bot public, including an API for developers and Integrations.

Integrations provide an easy method to launch your bot on various supported channels. These range from popular voice and messaging apps, to webpages and Pandorabots’ internal platform development zone: the Clubhouse.

The Clubhouse
Go to the Clubhouse.
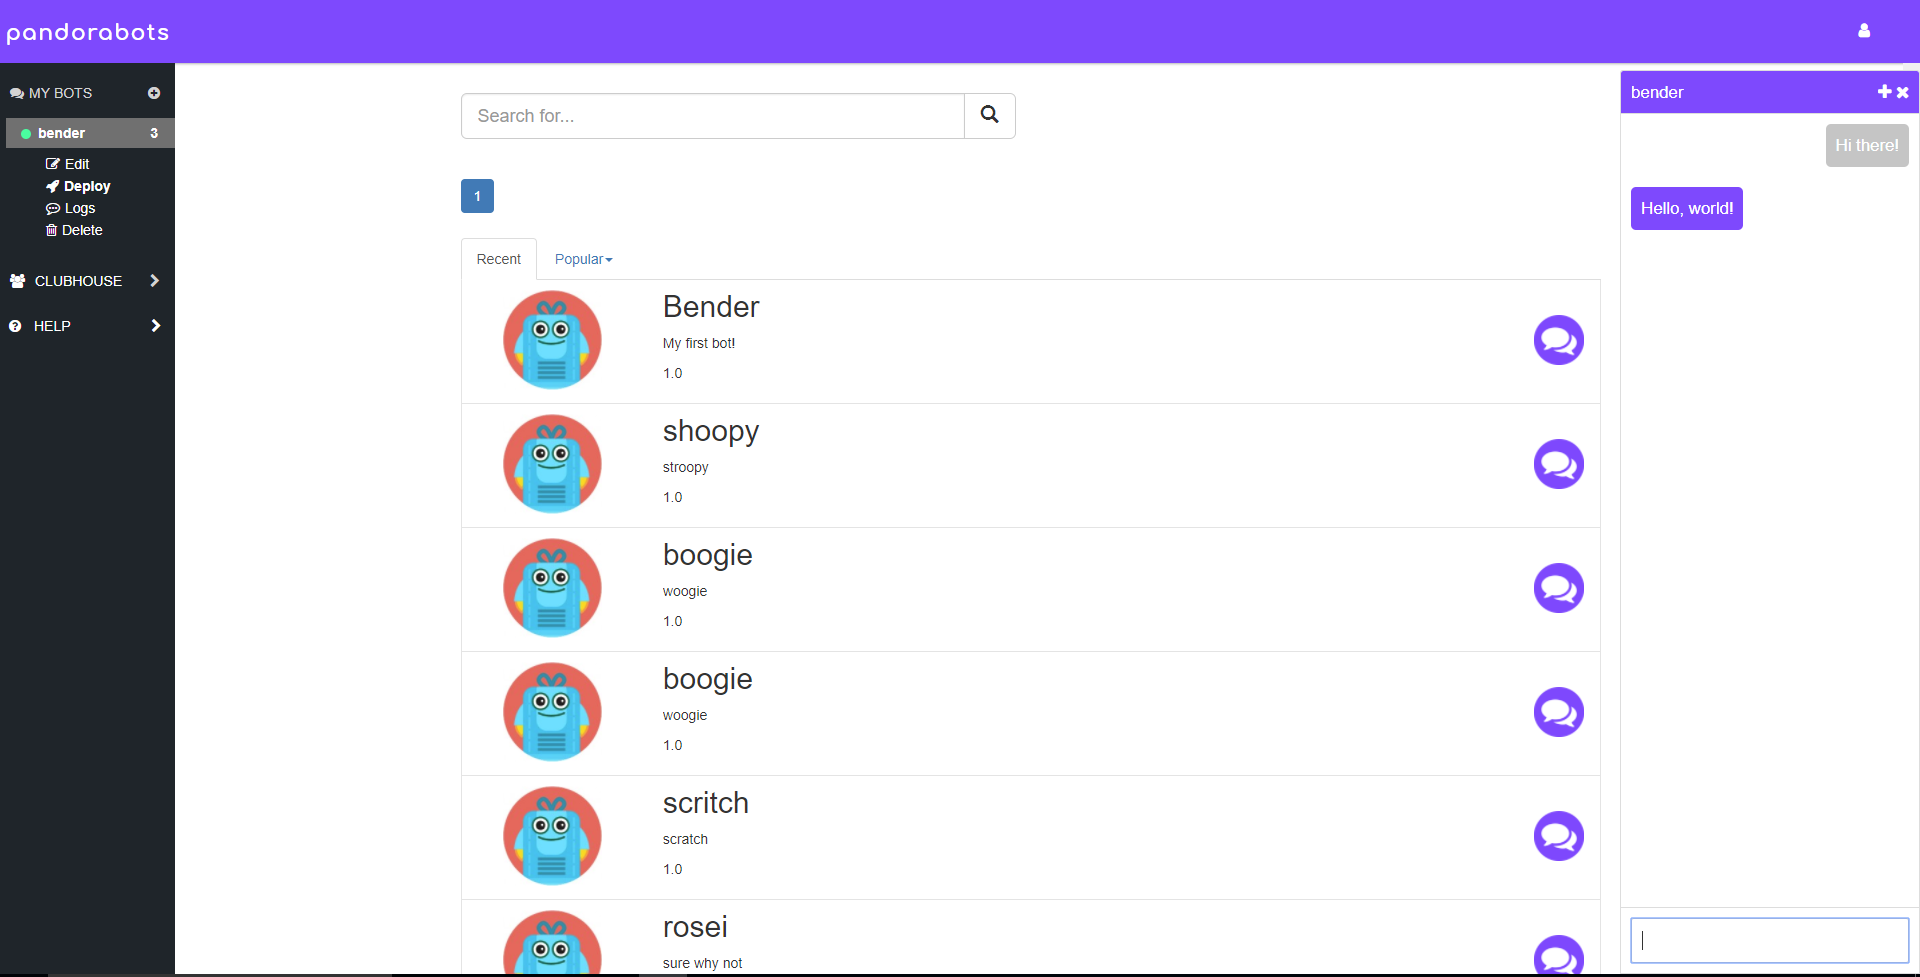
Collecting and Exchanging Logs in the Clubhouse
The Clubhouse lets you beta test your bot-in-progress in a botmaster-only environment. Here, you can collect chatlogs to review and improve your bot, and pay back the favor by chatting with other people’s bots.
Individual Bot Statistics
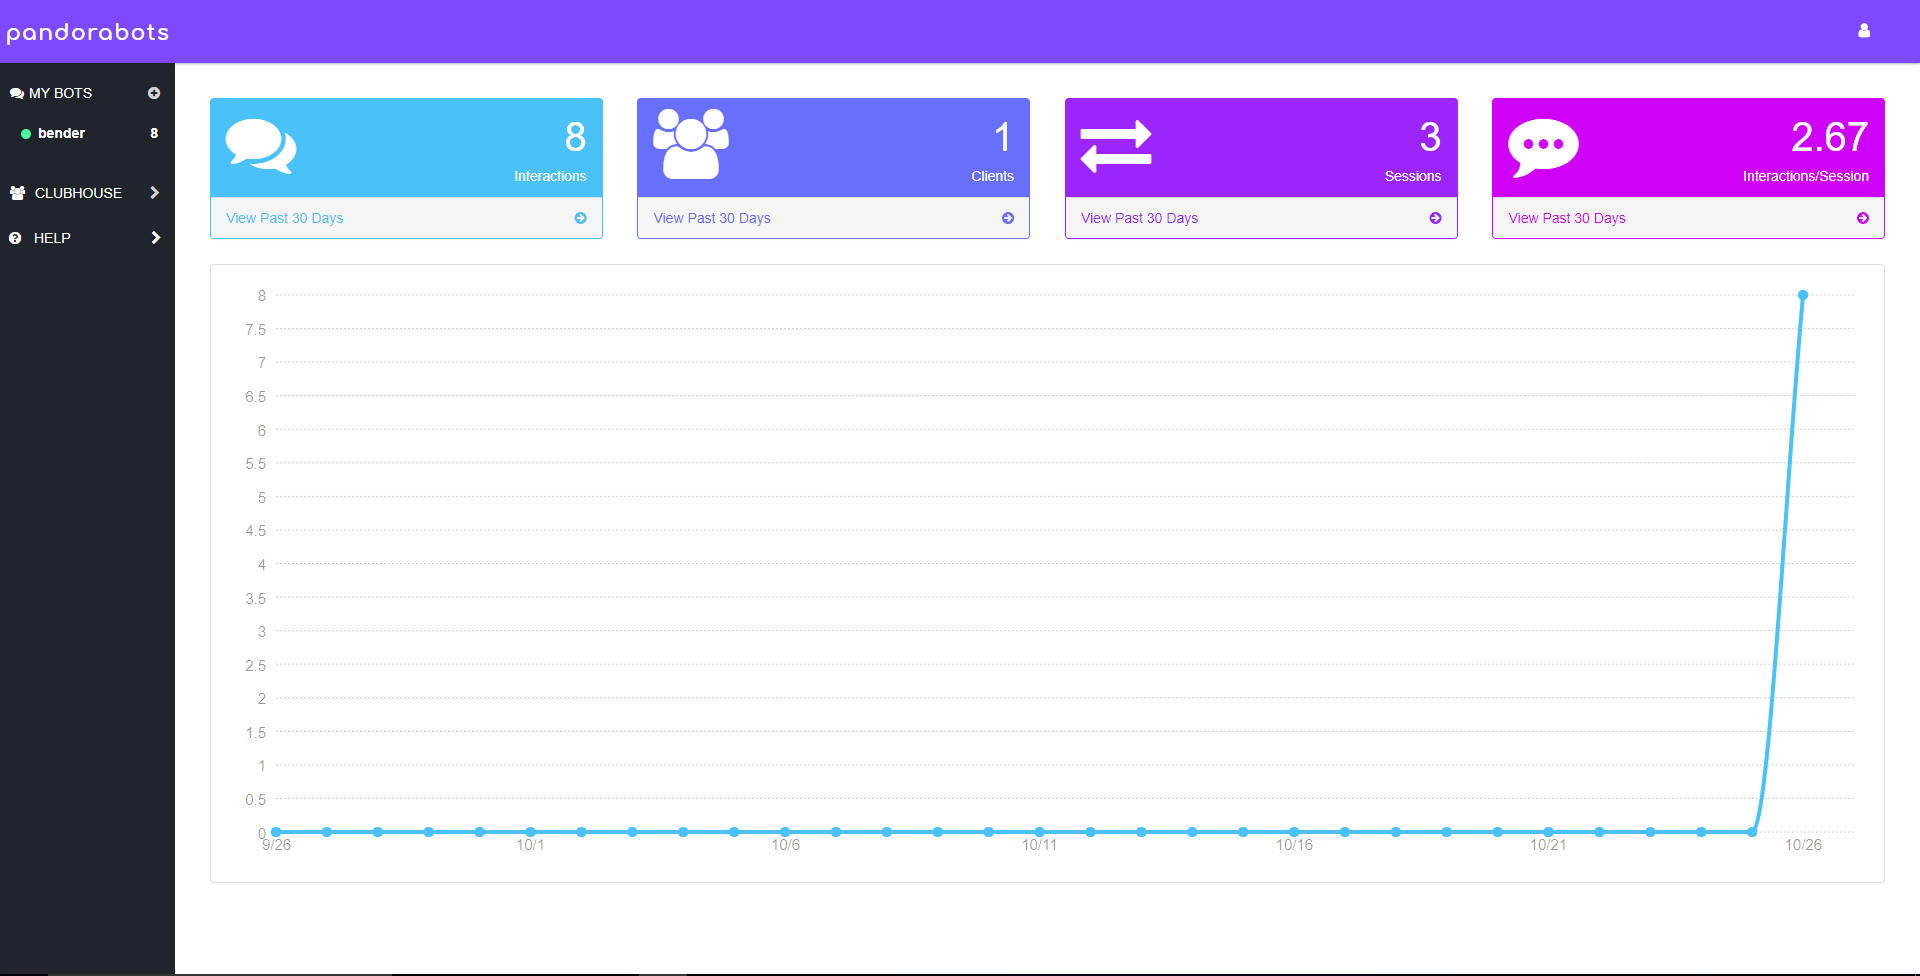
The number of unread logs will be displayed next to your bot’s name. Click on your bot’s name to view other key stats.

Global Bot Statistics
Usage statistics like total number of monthly interactions, clients, sessions, and the average interactions per session are displayed dating back 30 days. Selecting “My Bots” will display these overall statistics for all your bots.
Bot Indicator Lights
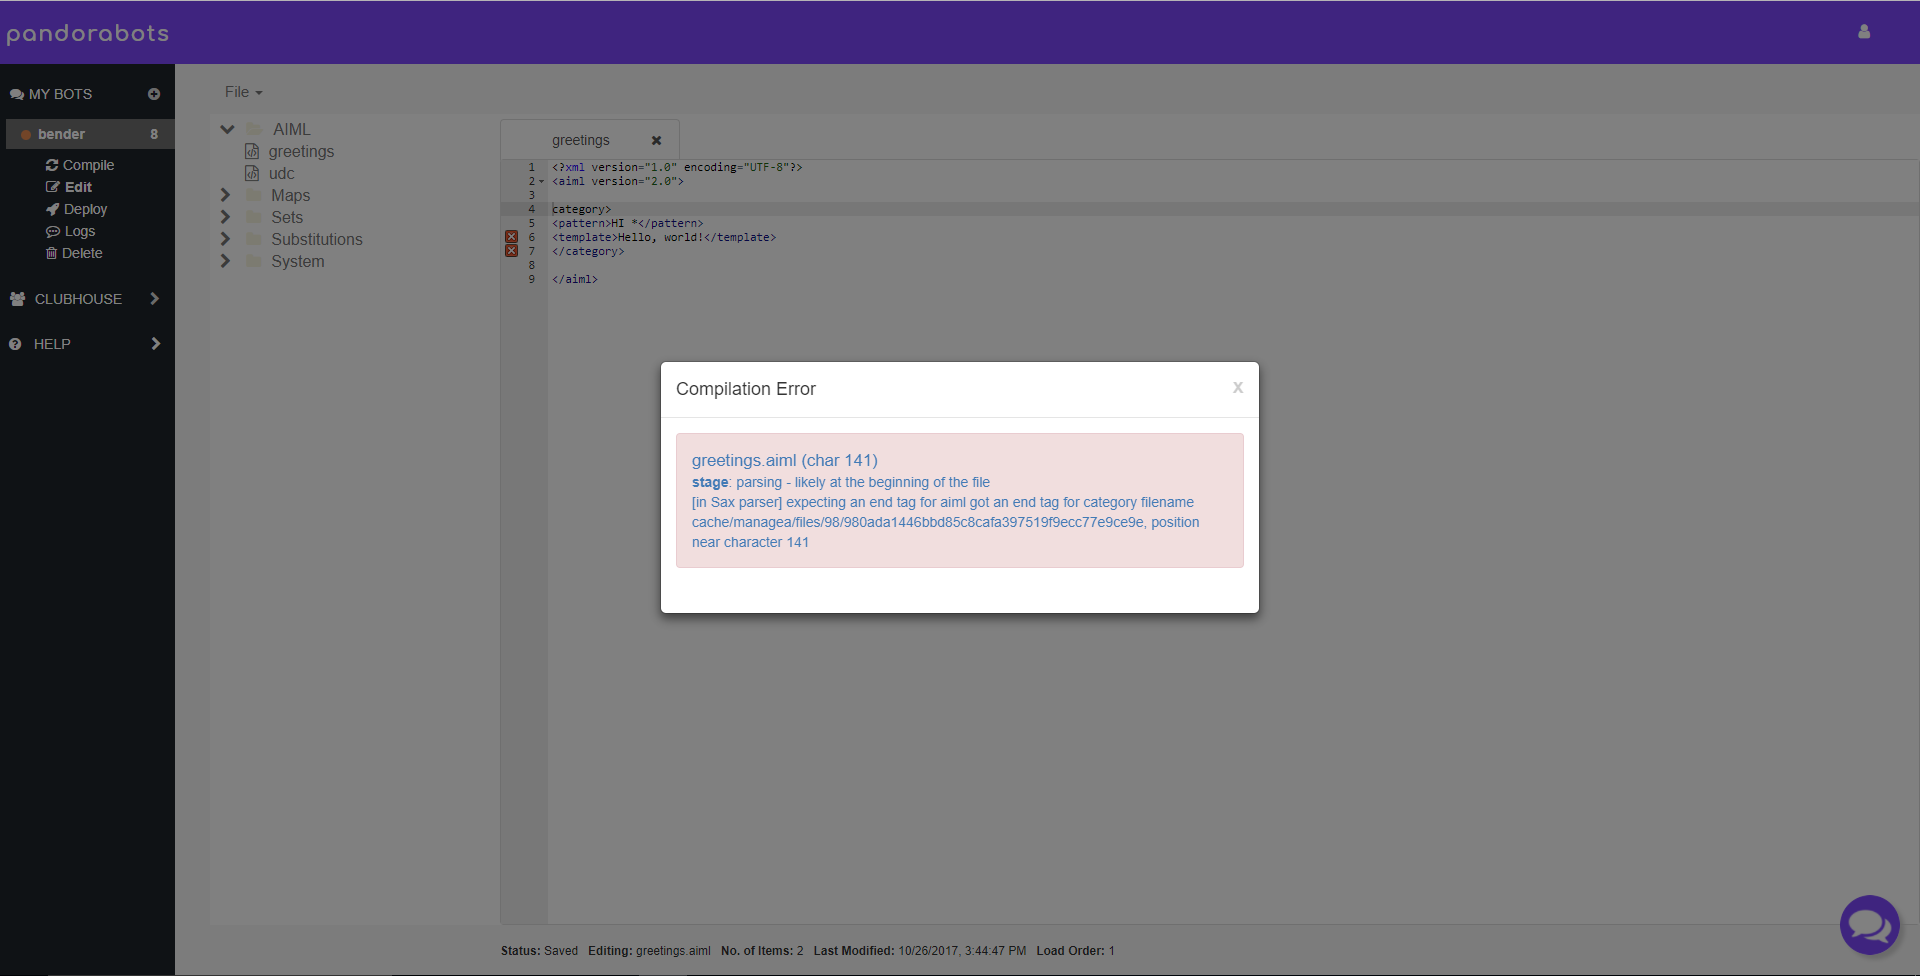
One more thing. The green indicator light next to your bot means it is Compiled, i.e., functioning normally.
If this turns red, your bot is Uncompiled, meaning something is broken. Clicking “Compile” will display compilation errors (often caused by malformed AIML such as missing tags or syntax errors). Fixing the errors and clicking save or compile will re-compile your bot.
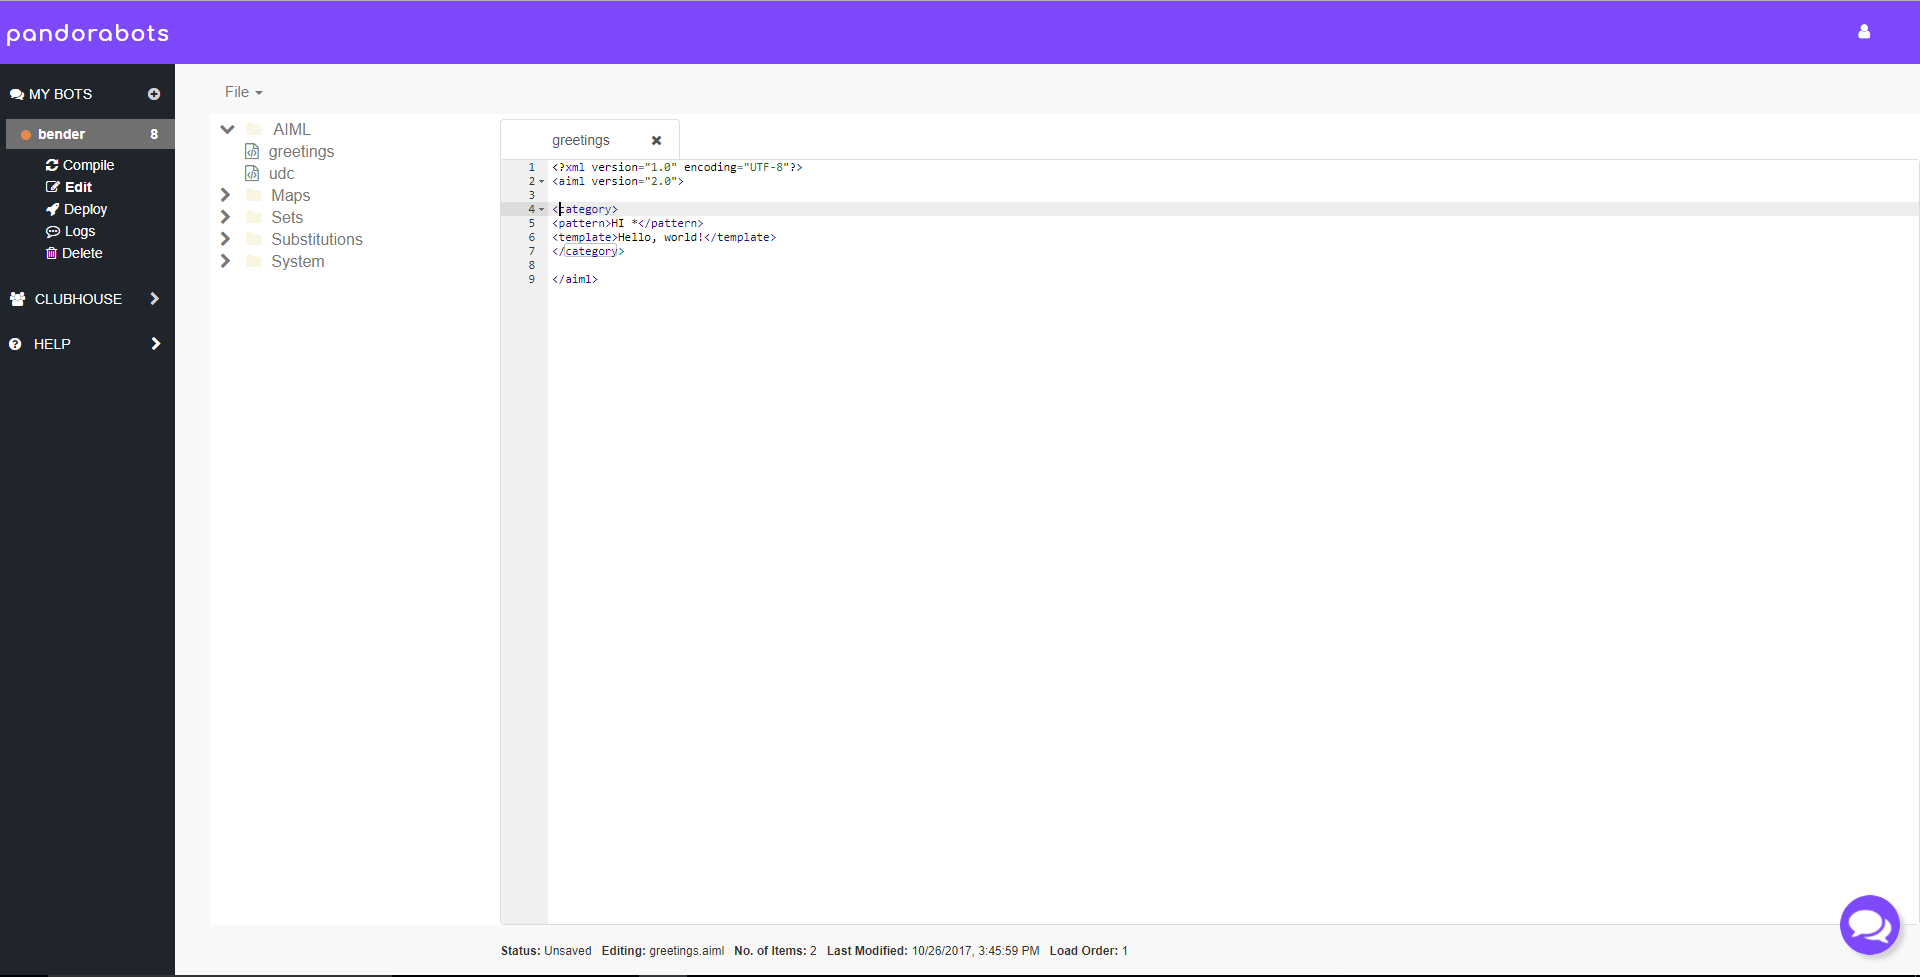
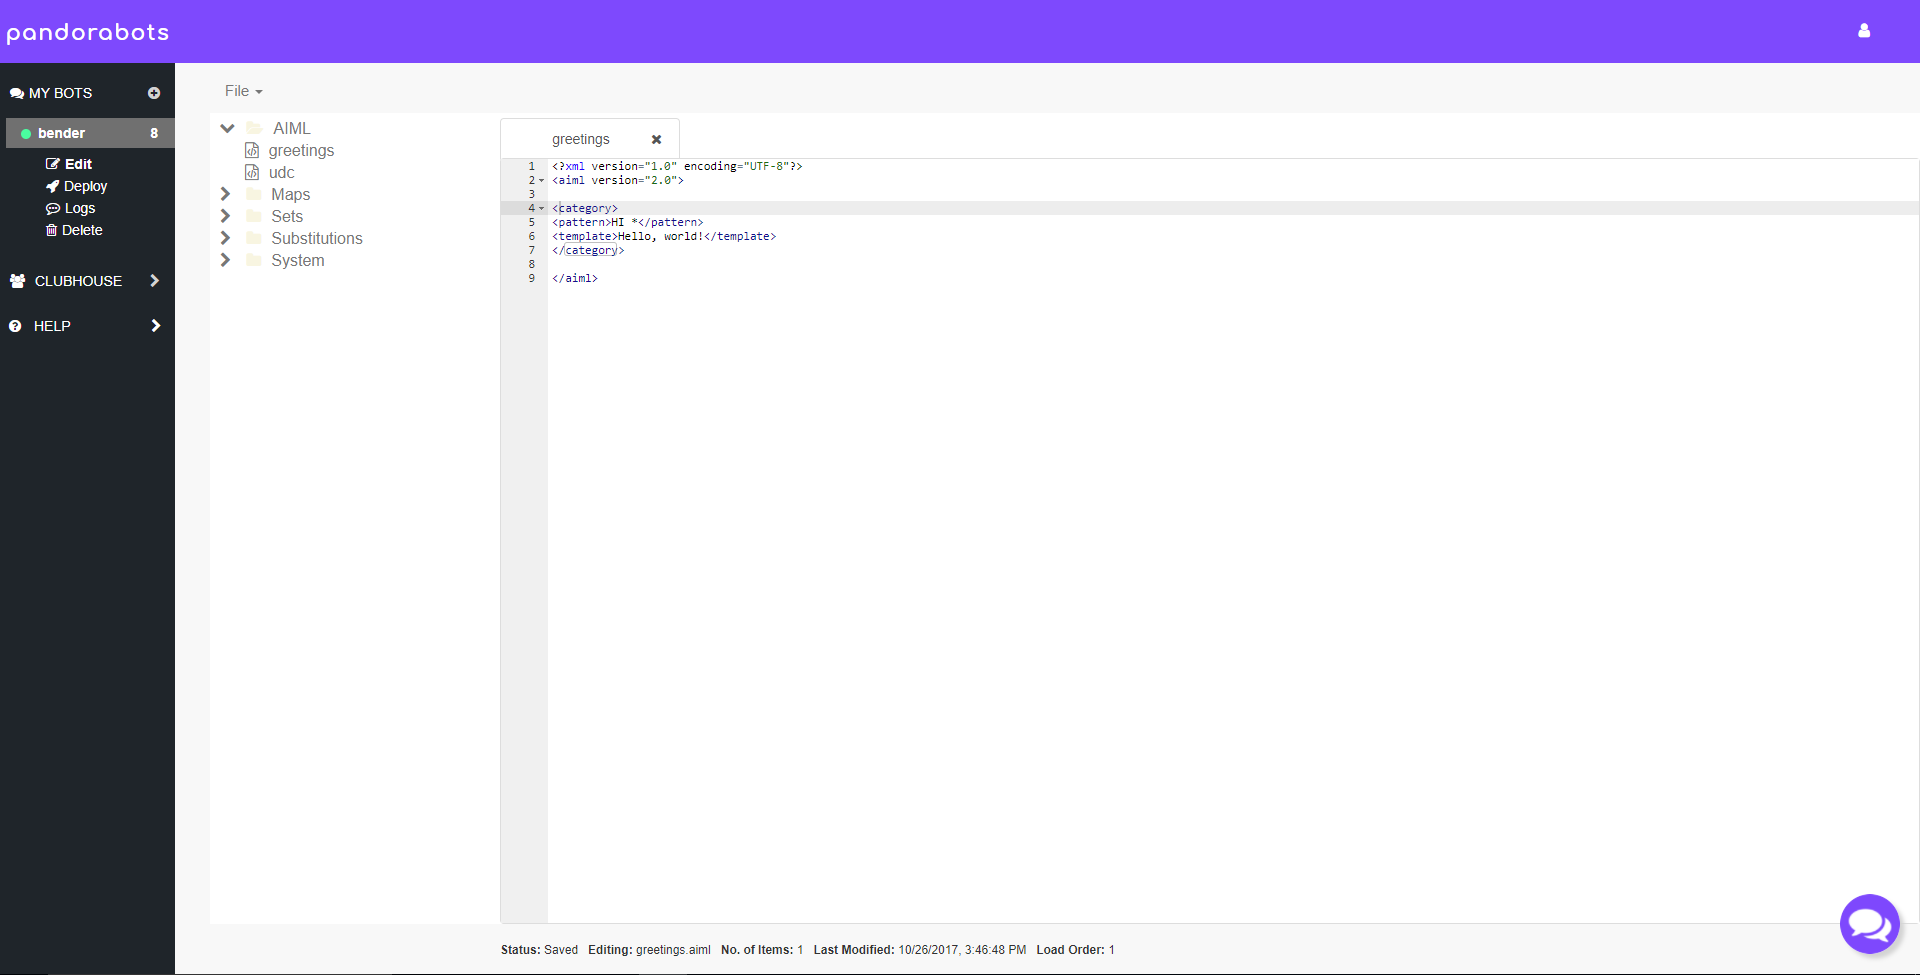
If your bot is deployed, a yellow light will appear when there are differences between the Sandbox version of the bot you are editing, and the Production version available to the general public. Clicking Publish will push saved Sandbox changes live to production.
Next Steps
Congratulations! You’ve just learned the fundamental basics for building AIML bots on the Pandorabots platform. As a next step, we highly recommend the tutorial Bot Building 101, and encourage you to explore additional resources in the Help section.
Creating a new bot and adding the “Small Talk” library, which will enable your bot to handle basic chitchat, is also a good way to further familiarize yourself with AIML code, or you can simply keep adding categories to your current bot via the Editor.
